In Previous posts I’ve talked about how to add applications to Azure AD for Single Sign On (Part 1, Part 2) and also how to automate user management using Graph API and also how to use Graph API to assign users to applications. This post will be about how you can then manage the users access to the applications in a more controlled way and also how you can delegate some of that management to the teams that user them.
Azure Entitlement Management is an Azure AD service, part of Identity Governance, that allows applications and services to be packaged together to allow for simpler management. For example when a new member joins your team there is always a period of uncertainty about whether they have the access they require and it is not until they try to access a specific system that you find out that they need adding to a specific group, application or SharePoint site. This always takes time especially if you are a larger company and requires a ticket raising and often approval sought before the access will be granted, often losing a number of days before access is given. Identity governance allows all the groups, applications and sites to be packaged together in one or more access packages so that a new user can be assigned to one access package and subsequently be given access to the services they require.Requests to be allocated to an access package can be made by the user requiring access and approval workflows can be added if required.
This can also be extended to users outside of your organisation, whether they are collaborative users who are part of your team or whether the users are accessing the digital services provided by your organisation.For this the users will access using Azure AD B2B. Another feature of Identity Governance is access reviews. A users access can be periodically reviewed, either automatically or manually to determine whether the user still required access. If access is no longer required or the user does not respond within a certain timeframe then access can be revoked. Therefore allowing users to be managed in a more efficient manner and removing access when it is no longer required, which is especially useful if a user has left an external organisation and you were not informed.
There is a hierarchical structure to Entitlement Management starting with a Catalog. A catelog contains Resources that can be added to Access Packages. An access package contains a collection of Azure AD groups, Applications and SharePoint sites, along with rules determining which users are allowed to be assigned to the package and an associated approval workflow. Management of access packages can be delegate to a subset of users who are close to the teams and customers requiring access.
To create a Catelog, got to the Azure portal and click on or search for Identity Governance:

The in the Entitlement Management section click “Catelogs”

To create a new Catelog, click “New Catelog”

Enter some information relating to the catelog and decide whether the Catelog is to be used by External users i.e. B2B users outside of your organisation:
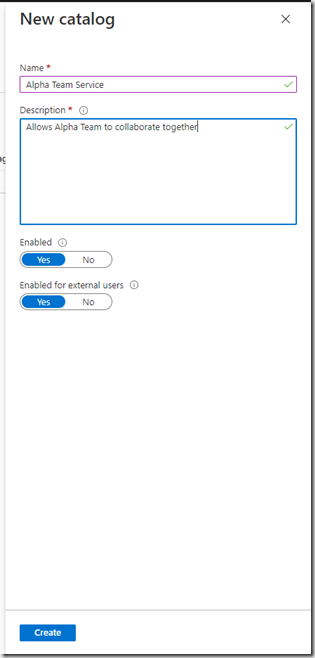
The catelog is a container for the resources you want to package and can also be used to delegate the administration and there are a number of different roles that can be applied.
To Add resources to the catelog, Open the catelog by clicking on it.

Click on “Resources”, then “Add resources”


In my example we will be adding a number of groups and a number of applications to the catelog:
Click on “Groups and teams”:

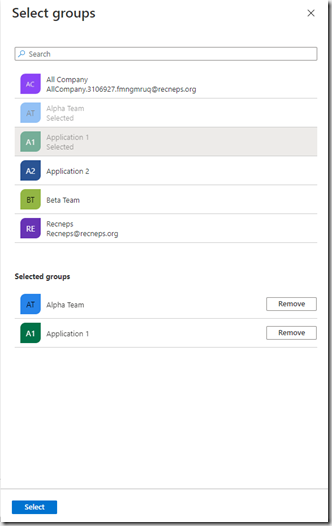
Pick the groups you require and click Select.
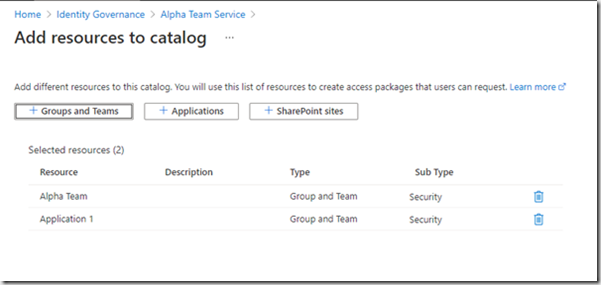
Now click “Applications”
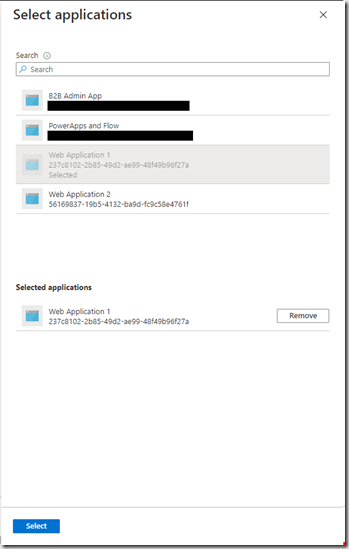
And pick the applications you require.
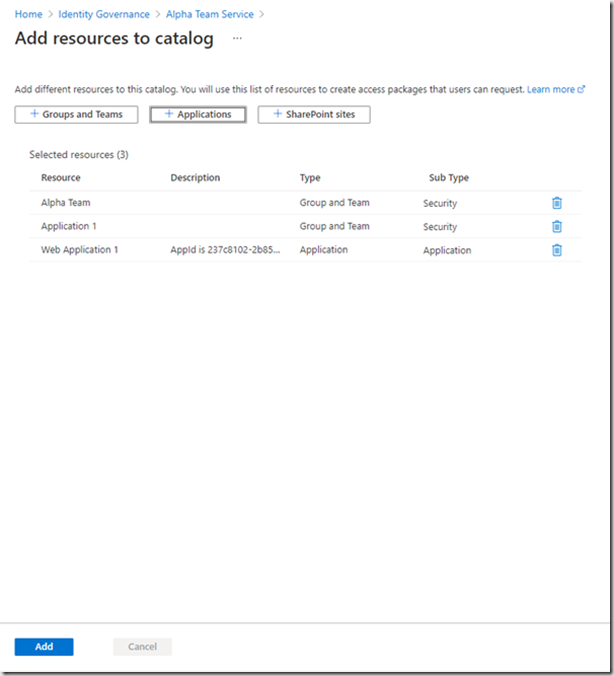
Click “Add”. Your resources are now assigned to the catelog. This has not provided any access to the resources, just added them to the catelog where they can be later added to one or more access packages.
You may now want to delegate some of the responsibility to managing the catelog. Roles can be assigned to users and details of the roles can be found here.

You can see that you can assign users to the different roles, click the role you want to assign and select the users you wish to assign the role to:

You can see here that I’ve assigned the access package manager to Fred. This will allow him to create new access packages based upon the resources that have been assigned to the catelog. He will not be able to assign any other resources that are not in the catelog. Jane has been given the package manager assignment role. This will allow her to be able to assign users to the packages that were created by Fred.

To Create an access package, click “Access Packages”, “New access package”

Populate the form:
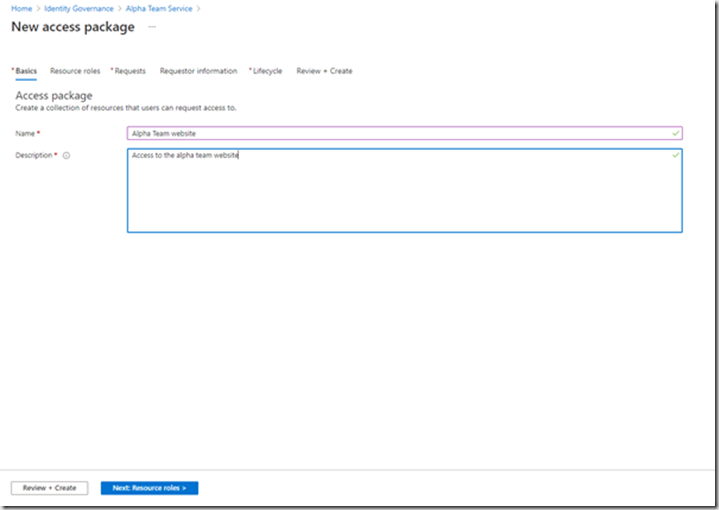
Click “Next:Resource roles”

Assign the applications and groups you need and select the roles (if any have been configured)
Now you need to decide who is allowed to access these application
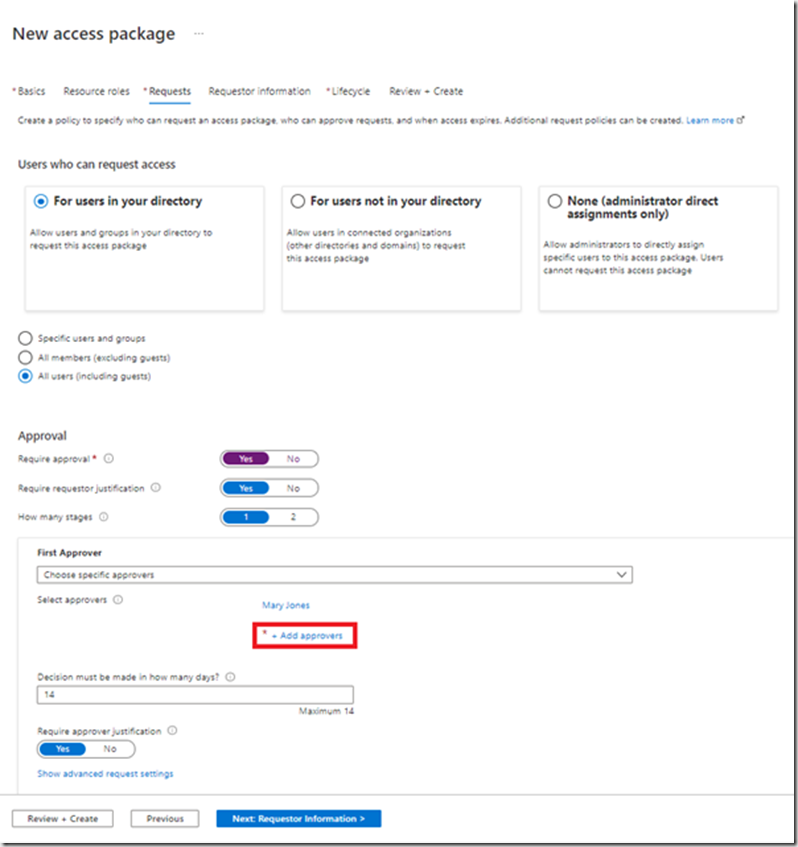
I’ve selected all users including guest users. Note, A guest user must first be invited into your Azure AD before they can request access to a package. I’ve clicked on the approval workflow. Now click “Add approvers” and select the users who are the approvers.
The next stage allows you to collect some data from the users to help the approvers determine whether access is allowed or not.

The next page is all about the access lifecycle. This allows you to configure a duration to the access and whether an access review is required or not.

The last page allows you to review the configuration and then click Create.
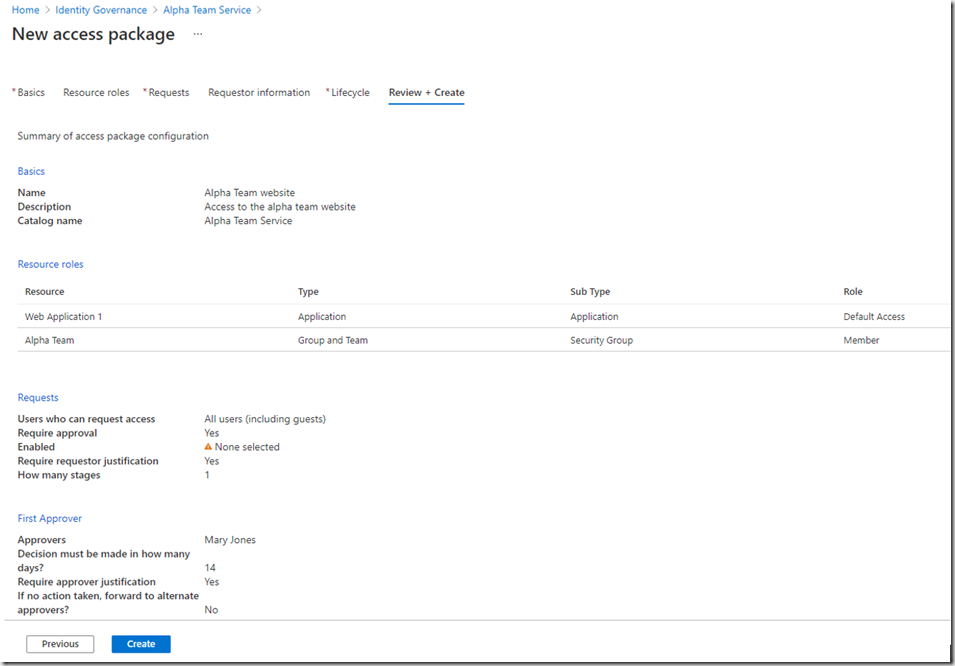
Unfortunately, I didnt complete all the sections correctly:
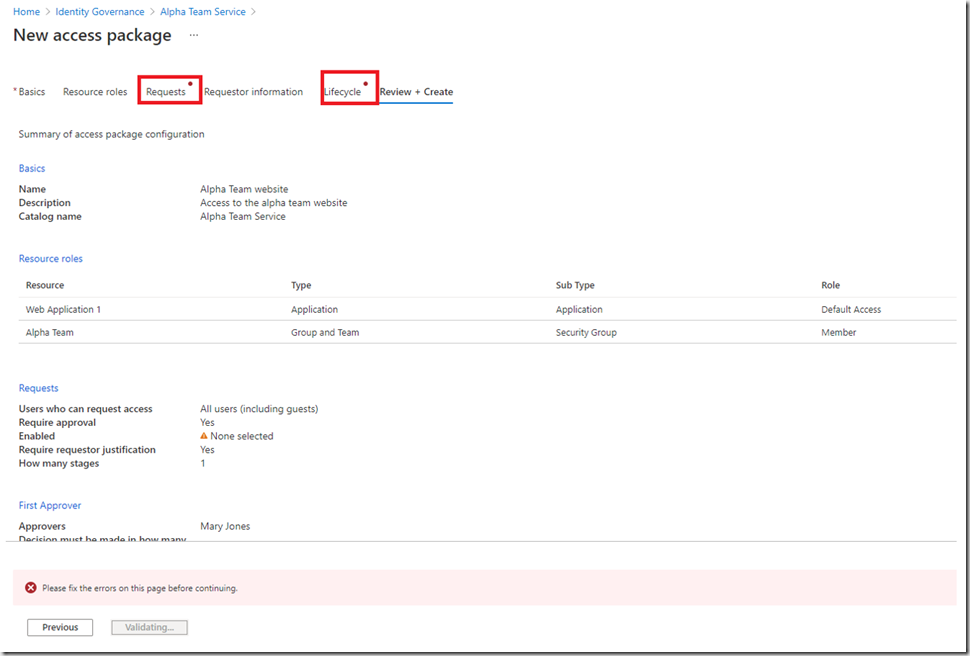
Clicking on the items allows you to navigate back and fix your issues:
In Lifecycle, I didnt click on whether an access review is required or not:

Lets configure a quarterly access review:
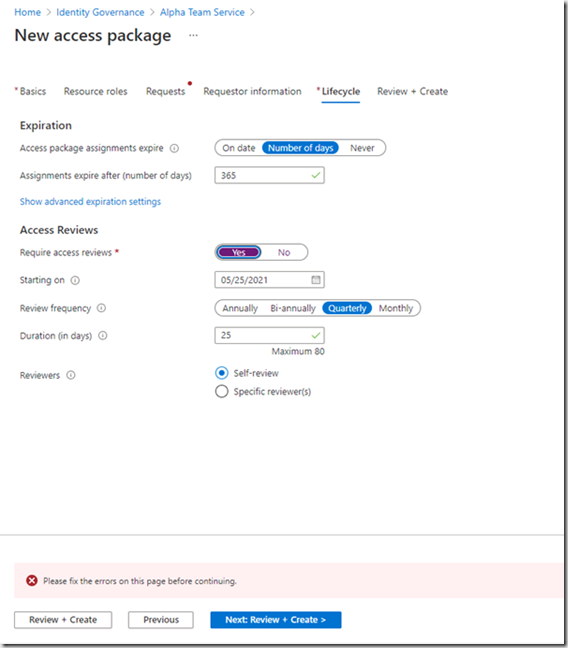
The users will be notified every quarter and asked whether they still require access or not. When you have fixed all the issues, click “Create”

On the overview screen, there is a link that is unique to your Azure AD. The link allows users in your organisation, based upon the setting in the requests section, to request access to this package. We configured it for all uses within your Azure AD.Clicking this link will take you to the site to request access.

Select the package and click “Request access”

The user will be presented with an access form with the questions you configured:

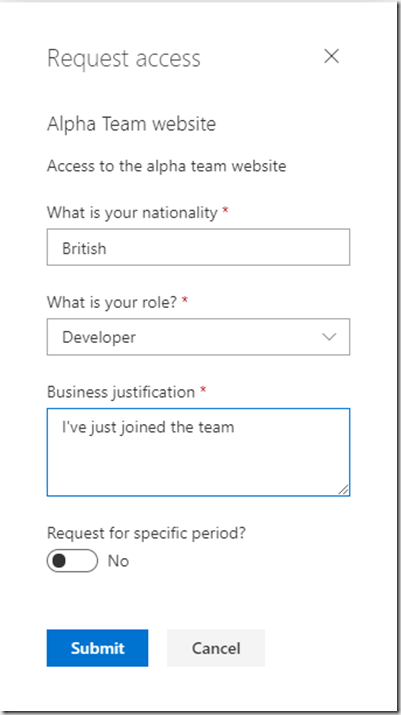
Complete the form and click “Submit”
The user can see the status of their request:

As an approver you can see what approvals are pending at https://myaccess.microsoft.com
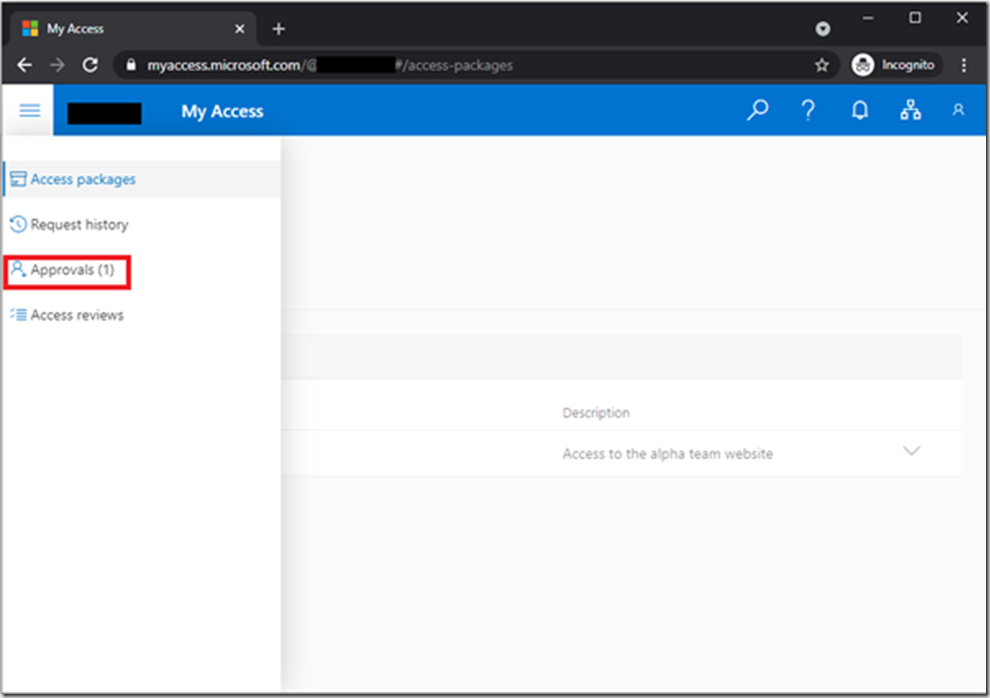
You can review the access request by expanding the Request Details and Package details and then Approve or Deny the access request
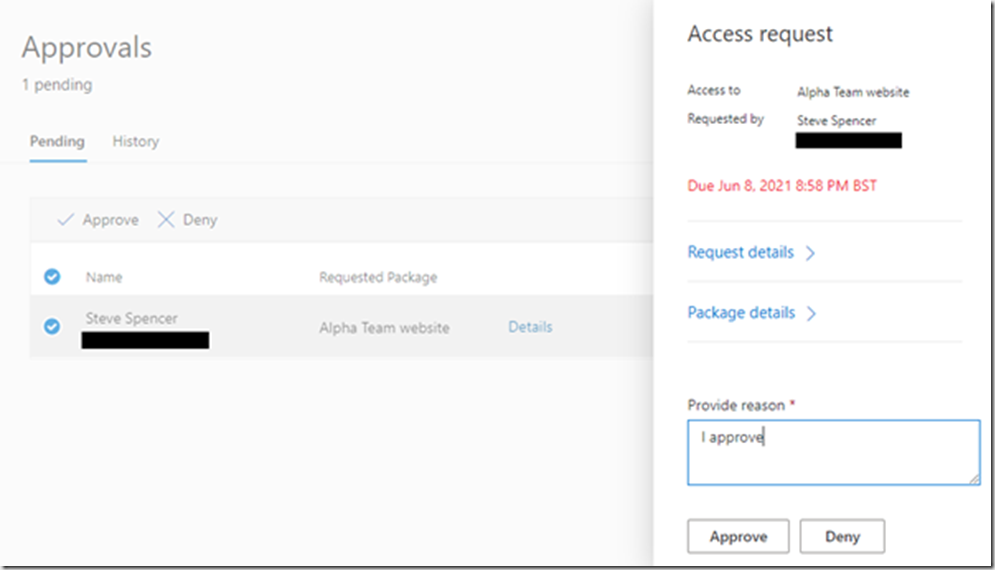
Upon approval the user will be able to see their access packages in their my access portal, along with the expiry date.

The user can also view the details of the request in the “Request history” section
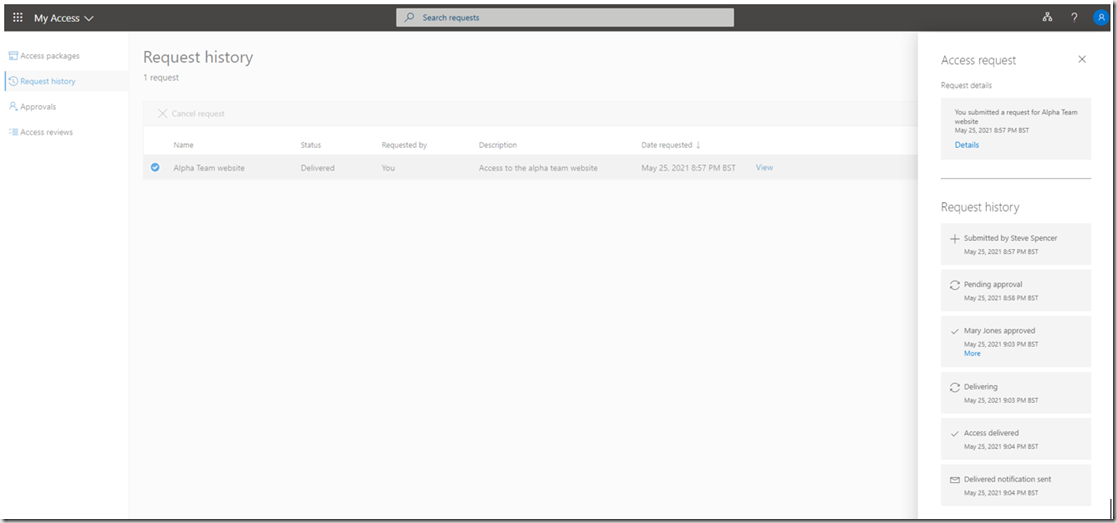
I hope you can see that Entitlement management will help you add some governance around your user management along with self service and user management delegation. I will be following up this post with one about automating the user assignment using Graph API, so keep a look out for it.