うなすけとあれこれ
TwitterにOAuth 2.0でログインできるomniauth-twitter2 gemを作りました

tl;dr
unasuke/omniauth-twitter2: omniauth strategy for authenticating with twitter oauth2
↑ これをつくりました
Twitter認証、要求される権限がデカい問題
Twitter認証でログインできるWebアプリというものは色々あり、便利なので日々使っているという方は多いことでしょう。
しかしTwitter loginで要求される権限の粒度はこれまで以下の3つしかありませんでした。
- Read
- Read and Write
- Read and write and Direct message
これはあまりにも大雑把で、「要求される権限が広すぎる!」「いやいやこういう事情で……」というやりとりを見掛けたことは何度もあります。
- 「Twitterのアプリ連携で余計な権限まで求められる!」その理由がよくわかるまとめ【やじうまWatch】 - INTERNET Watch
- Twitter認証時に求められる権限について – OPENREC
- 【公式】Peing-質問箱-さんはTwitterを使っています 「【Twitterの権限について】 Twitterアプリ開発者と、その利用者の間に多分すごく大きな誤解があると思うのでまとめてみました 権限のチェックは大切ですがアプリ開発者は細かくON/OFF出来ない事を知って貰えると嬉しいです:) https://t.co/Z9EFs0gX9i」 / Twitter
- 【なんでこのアプリ連携するのにxxまで許可しないといけないのか】Twitterアプリに設定できるアクセス権限は、3パターンからしか選ぶことができない | 今村だけがよくわかるブログ
このように解説する記事も多く存在します。
TwitterがOAuth 2.0をサポートした
さて2021年12月15日、TwitterはOAuth 2.0のサポートをGeneral Availabilityとしました。
Announcing OAuth 2.0 General Availability - Announcements - Twitter Developers
本日、OAuth 2.0と新しい詳細な権限機能を全ての開発者に提供開始しました。私たちとともにベータ版の開発をサポートしていただいたコミュニティの皆さん、ありがとうございました。
— Twitter Dev Japan (@TwitterDevJP) December 15, 2021
詳細は以下の英語フォーラムをご覧ください👇 https://t.co/pNxzNqqfig
このタイミングで、
all developers can implement OAuth 2.0 and new fine-grained permission scopes in the Twitter developer porta
とあるように、"fine-grained" な、つまり適切な粒度での権限要求が可能となりました。
具体的にどのようなscopeで要求できるかというのは、記事作成時点で以下のようになっています。
https://developer.twitter.com/en/docs/authentication/oauth-2-0/authorization-code
tweet.read, tweet.write, tweet.moderate.write, users.read, follows.read, follows.write, offline.access, space.read, mute.read, mute.write, like.read, like.write, list.read, list.write, block.read, block.write
これまでと比較してとても細かく指定できることがわかります。
omniauth-twitter2 gem
さて、こうなるとOAuth 2.0でTwitter loginしたくなってきますね。Ruby及びRailsにおいてWebアプリでのSocial Accountによるログインといえば、OmniAuthがそのデファクトスタンダートと言えます。
https://github.com/omniauth/omniauth
ということで、OmniAuthのいちstrategyとして、omniauth-twitter2というgemを作りました。
unasuke/omniauth-twitter2: omniauth strategy for authenticating with twitter oauth2
使い方はよくあるOmniAuthのstrategyの導入と同様です。具体的にどのような挙動になるかはサンプルアプリを用意しました。
- https://twitter-login-app.onrender.com/ (サンプルアプリ)
- https://github.com/unasuke/twitter-login-app (サンプルアプリのソースコード)
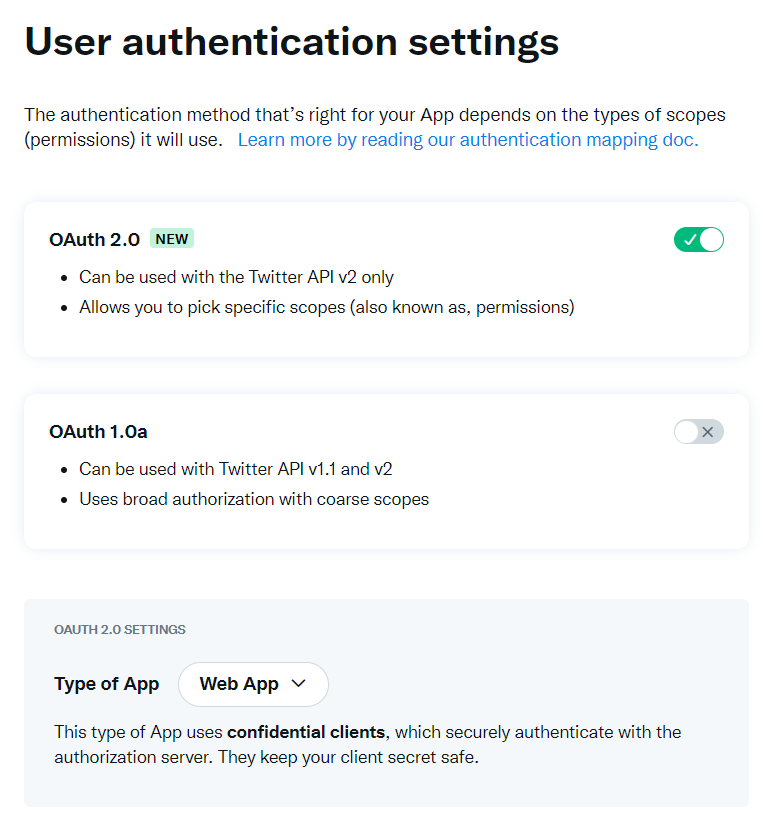
Client IDとClient Secret、その他OAuth 2.0の有効化については developer.twitter.comで行う必要があります。

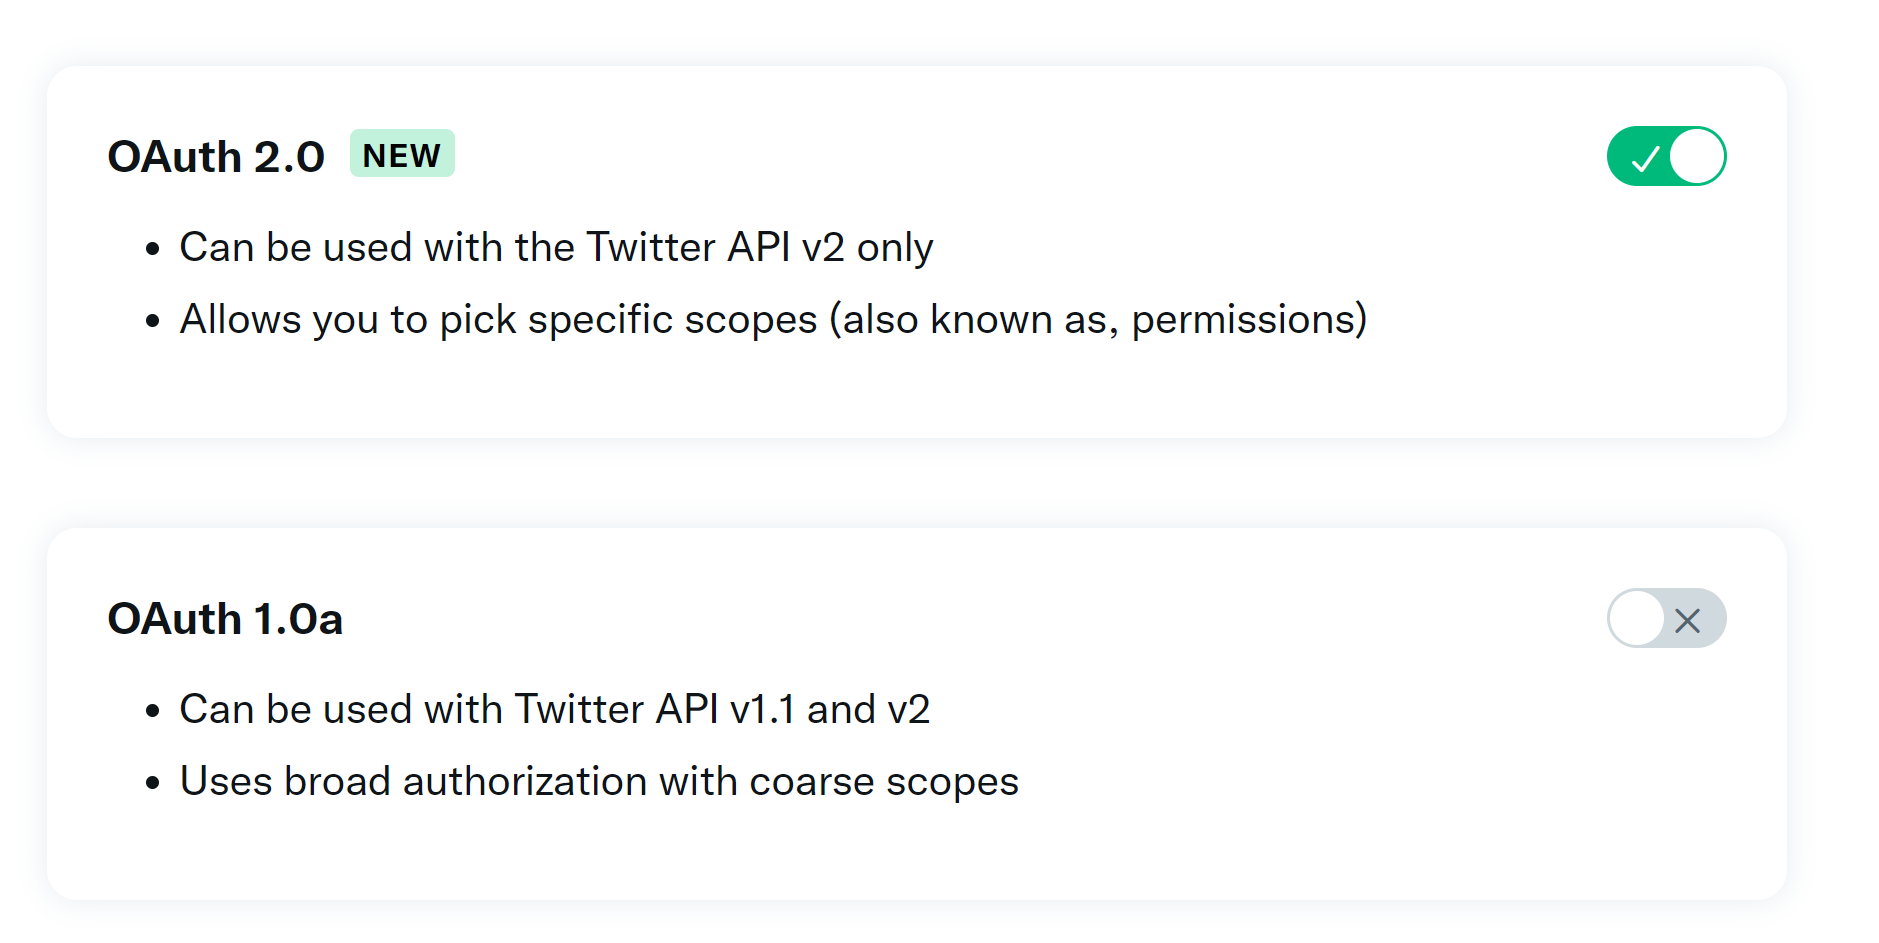
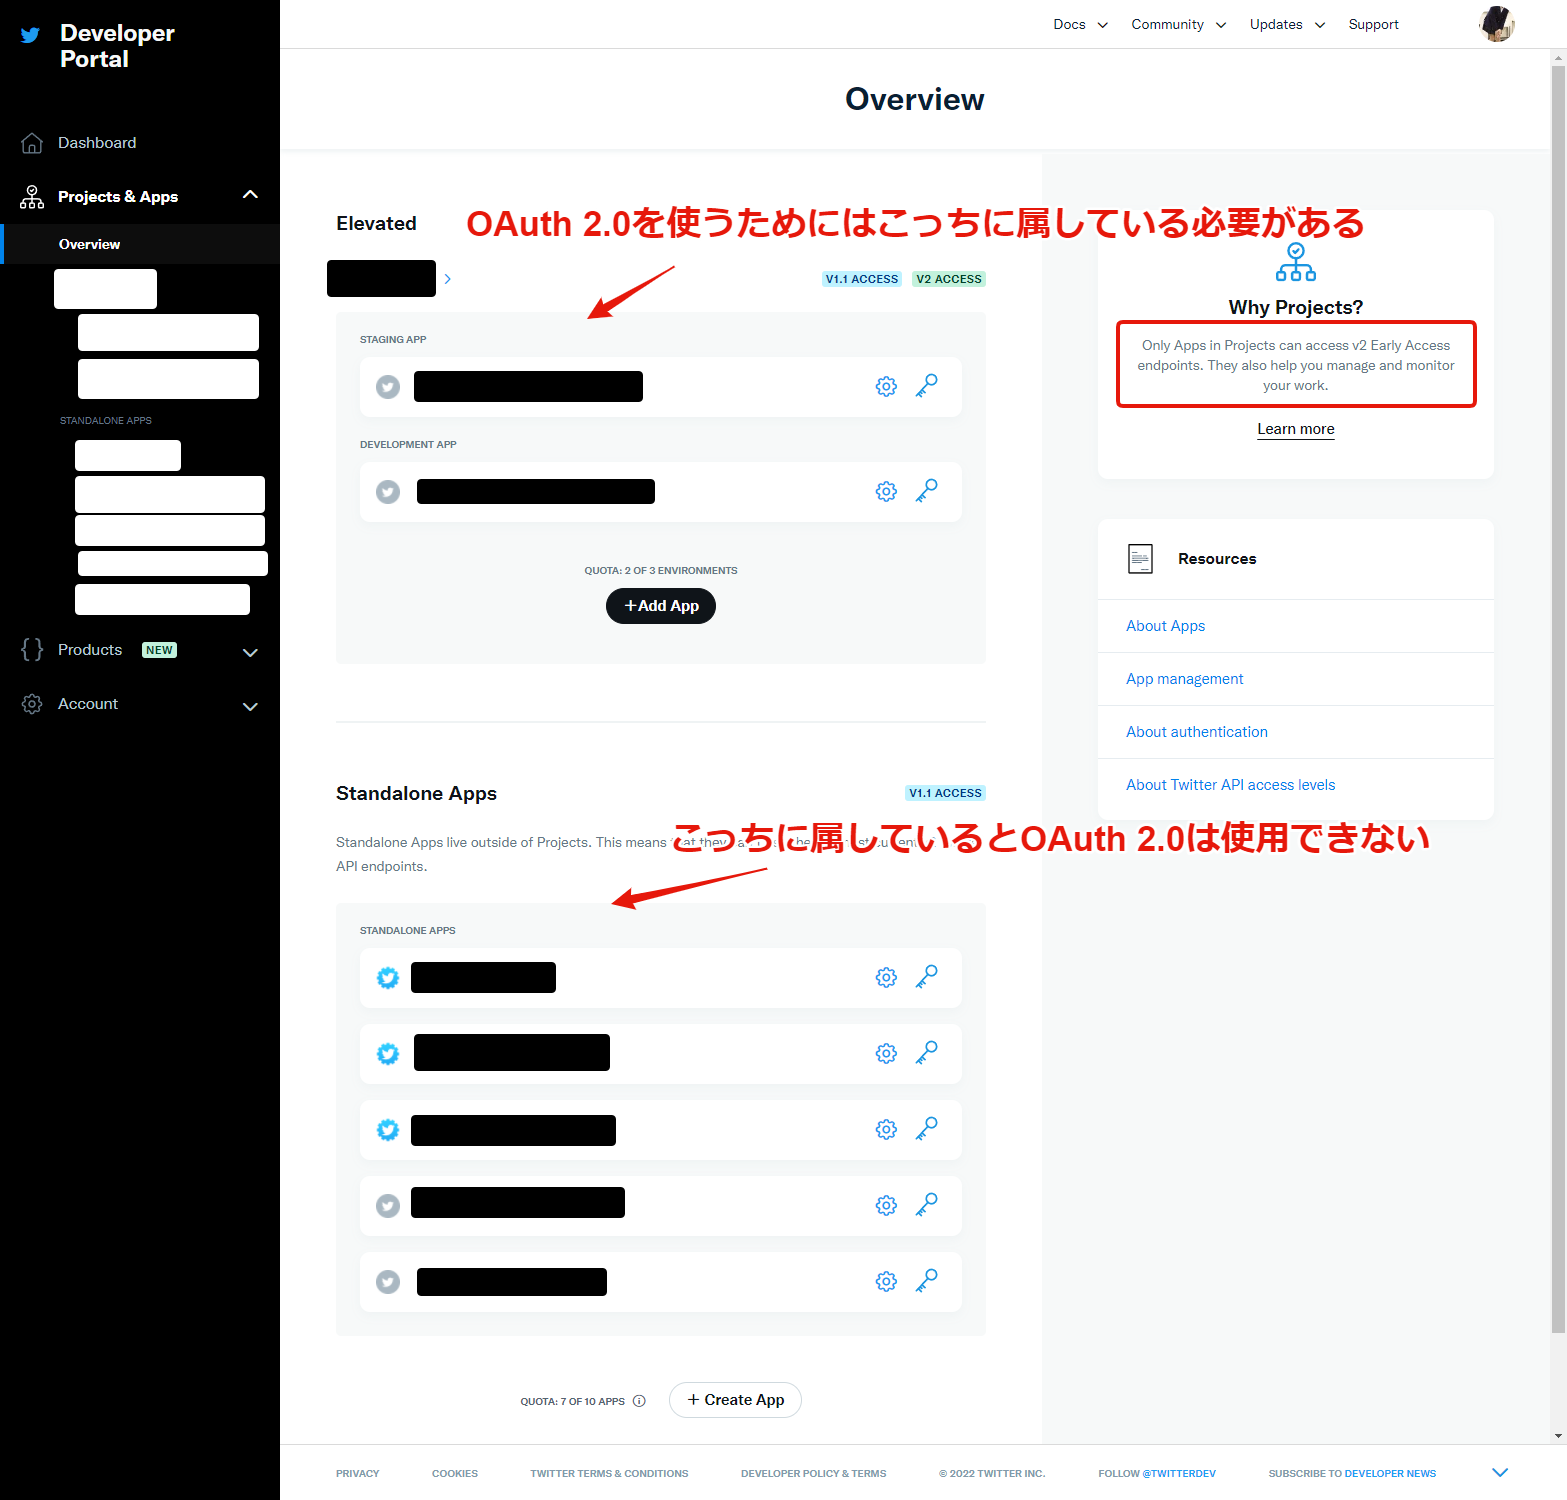
気をつけないといけないのは、OAuth 2.0 を有効にするためにはProjectを作成し、その下にAppを作成する必要があるという点です。Standalone AppsでもOauth 2.0 は有効にできそうなUIになっていますが、実際にはProjectに属していないといけないようです。

https://developer.twitter.com/en/docs/twitter-api/getting-started/about-twitter-api
そして、現時点で無料プランの最高となれるElevated1においては、Projectは1つ、その下に3つのAppを所属させることができますが、それ以上は Elevated+ にアップグレードしないとダメで、おそらく有料です。そしてまだcoming soonとなっています。
僕は認証、認可、OAuth 2.0の専門家ではないので、実装には誤りが含まれる可能性が高いです。皆さんのPull Requestをお待ちしています。
余談 Render.com について
今回サンプルアプリをホスティングする先として、render.comを選択しました。
公式WebサイトにHerokuとの比較を記載しているあたり、Herokuの立場を狙っているような感じがあります。今回renderを採用した最大の理由として、HTTP/2をサポートしていることです。
Heroku serves all content over HTTP/1.1. However, major browsers have supported HTTP/2 since 2015. Render serves all requests over HTTP/2 (and HTTP/3 where available), falling back to HTTP/1.1 for older clients. This minimizes simultaneous connections to your Render apps and reduces page load times for all your users. https://render.com/render-vs-heroku-comparison
ただ一点、Free planにおいて、PostgreSQLが使用できるのですが、作成後90日経過すると停止するので再度作成しないといけない(ように見える、実際dashboard上でもpaid planへのupgradeを要求される)というのがネックです。
Render’s free database plan allows you to run a PostgreSQL database that automatically expires 90 days after creation. https://render.com/docs/free
今回のサンプルアプリでは、DatabaseだけはHeroku Postgresを使うことにしました。
-
Academic Research planもありますが、ProjectとAppの制限はEssentialと同様になっています。 ↩