Configuring Reason Tree
In the "Reason Tree" configuration, you can create multiple reason trees when compared to the "Time Model" configuration. You can create reason trees for either a line or a specific machine type.
Prerequisite
Before configuring "Reason Tree", ensure that the "Time Model" configuration is completed.
To configure the reason tree, it is important to understand its basic concepts.
User interface
The user interface of "Reason Tree" is as shown below:
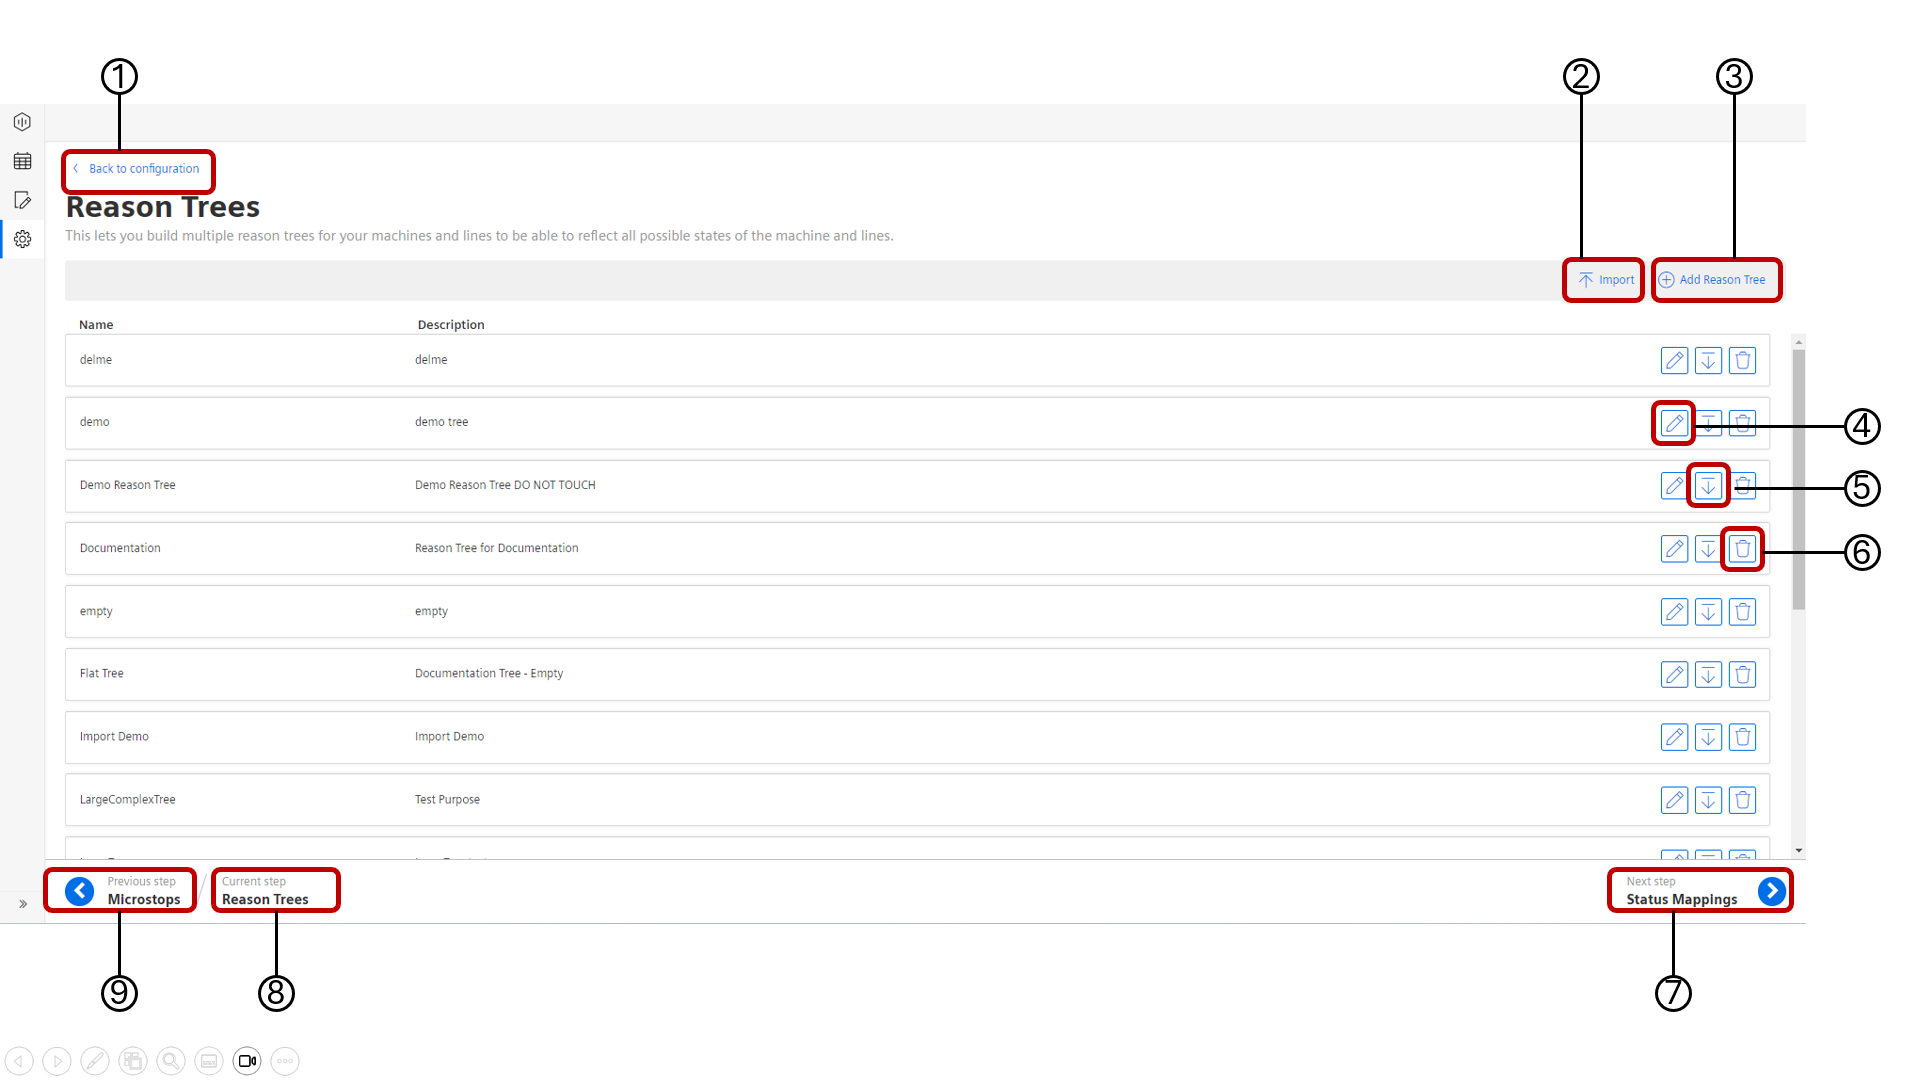
① Navigates to the "Configuration" tab
② Imports a Reason Tree
③ Adds a new Reason Tree
④ Edits the selected Reason Tree
⑤ Exports the selected Reason Tree
⑥ Deletes the selected Reason Tree
⑦ Navigates to the next step
⑧ Displays the current step
⑨ Navigates to the previous step
Procedure
To create a reason tree, proceed as follows:
- From the navigation tab, click "Configuration" and select "Reason Tree".
- In "Reason Tree", click "Add Reason Tree".
-
Enter "Name" and "Description".

Note
- The description field is mandatory. It helps the user to distinguish between different reason trees.
- The changes are auto-saved and will directly appear in the application.
- The description field is mandatory. It helps the user to distinguish between different reason trees.
-
Click
 to add the "State" or "Reason Layers" to start building the tree structure.
Note
- In "Reason Tree", the mandatory name, description and time categories will be displayed to start building the tree structure.
- Click
 to delete the "State" or "Reason Layers".
 - The time categories in the first column cannot be further modified, for example, renamed or deleted.
- By clicking next to the time category again, you can create another "State" or "Reason Layers" for the time category and this can be repeated multiple times.
- In general, click to create a child element to the existing element. Thereby, it is possible to create the tree structure.
- In "Reason Tree", the mandatory name, description and time categories will be displayed to start building the tree structure.
-
After adding the Reason Tree structure, click the "Back to reason tree overview" button and click "Next step" to proceed with status mapping.
Note
By default, existing reasons will be sorted in alphabetical order. New reasons will be set on the top and will not be sorted. New reasons will be marked with a new label. The next time when the reason tree is accessed, the new reasons will be sorted as well.
Importing or Exporting a reason tree
For more information on the steps to import or export a reason tree with Excel sheets, refer to Excel Import Reason Tree & Status Mapping.