███╗   ███╗██╗██████╗ ██╗    ██████╗      ██████╗██╗   ██╗
████╗ ████║██║██╔══██╗██║    ╚════██╗    ██╔════╝██║   ██║
██╔████╔██║██║██║  ██║██║     █████╔╝    ██║     ██║   ██║
██║╚██╔╝██║██║██║  ██║██║    ██╔═══╝     ██║     ╚██╗ ██╔╝
██║ ╚═╝ ██║██║██████╔╝██║    ███████╗    ╚██████╗ ╚████╔╝
╚═╝     ╚═╝╚═╝╚═════╝ ╚═╝    ╚══════╝     ╚═════╝  ╚═══╝
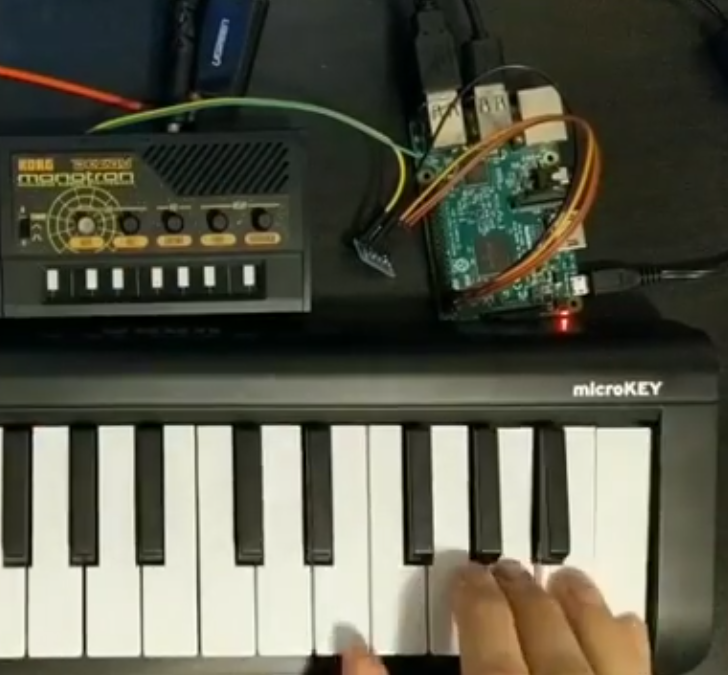
This DIY MIDI-to-CV controller allows you to automatically tune voltage-to-frequencies and only has three components (and no PCBs!). Other solutions - like the MIDI-IF kit or Arduino-based midi2cv - require extensive soldering, dozens of components, and require manual tuning.
I use this script to control the Korg Monotron Delay via MIDI but it might work with other CV instruments. More info and tutorial for using with the Monotron: schollz.com/monotron.
- Raspberry Pi (~$15 used)
- USB audio adapter (~$5)
- MCP4725 (~$5)
Use SSH to get into your Raspberry Pi and install the following prerequisites:
> sudo apt update
> sudo apt install python3 python3-pip python3-numpy portaudio19-dev sox gnuplot ffmpeg
> sudo -H python3 -m pip install loguru click mido python-rtmidi adafruit-circuitpython-mcp4725 termplotlib aubio
Now download the midi2cv.py script:
> wget https://raw.githubusercontent.com/schollz/midi2cv/master/midi2cv.py
Attach the MCP4725 to the Raspberry Pi and attach the MCP4725 voltage output to your synthesizer. Now connect an audio cable from your synthesizer to the USB audio adapter on the Raspberry Pi.
Make sure that your synthesizer is outputting as pure a sound as possible. And then run:
> python3 midi2cv.py --tune
The tuning will automatically create a fit to the voltage-frequency data:
                  frequency (hz) vs voltage

  2000 +------------------------------------------------+
  1800 |                                              A |
       |                                           A A  |
  1600 |                                           A    |
  1400 |                                          A     |
       |                                        A       |
  1200 |                                     A A        |
  1000 |                                    A           |
       |                                 AA             |
   800 |                            A AA                |
   600 |                         A A                    |
       |                   AA AA                        |
   400 |             AA AA                              |
   200 |  A AA AA AA                                    |
       | A                                              |
     0 +------------------------------------------------+
      2.6   2.8    3    3.2    3.4   3.6   3.8    4    4.2
                          voltage (v)
After tuning, it will save a calibration that will automatically load the settings for playing.
First plug in your MIDI devices (if you have) and then just run:
> python3 midi2cv.py --play
That will automatically load the calibration and listen for any MIDI devices.
You don't need to plug in a MIDI device, you can always use the MIDI through port to do sequencing, for example with miti.
MIT