Welcome to Cookie Consent
Free Cookie Consent Notice Banner to comply with GDPR, ePrivacy Directive, Google Consent Mode v2.
By TermsFeed
On this page:

NEW! Try the new and advanced Cookie Consent solution: user consent log, geolocation detection (ie. show notice banner only when required) and more customization options. Try Privacy Consent today.
How to implement Cookie Consent
Our free Cookie Consent can help you comply with GDPR and ePrivacy Directive. This guide will help you go through the 5 easy steps to implement our free Cookie Consent notice banner.

Step 1
Choose your compliance preferences
Start building your Cookie Consent today. Choose the preferred compliance type: ePrivacy Directive or GDPR+ePrivacy Directive.

Step 2
Customize your Cookie Consent
Customize your Cookie Consent with your website name, the preferred color palette and the default language.

Step 3
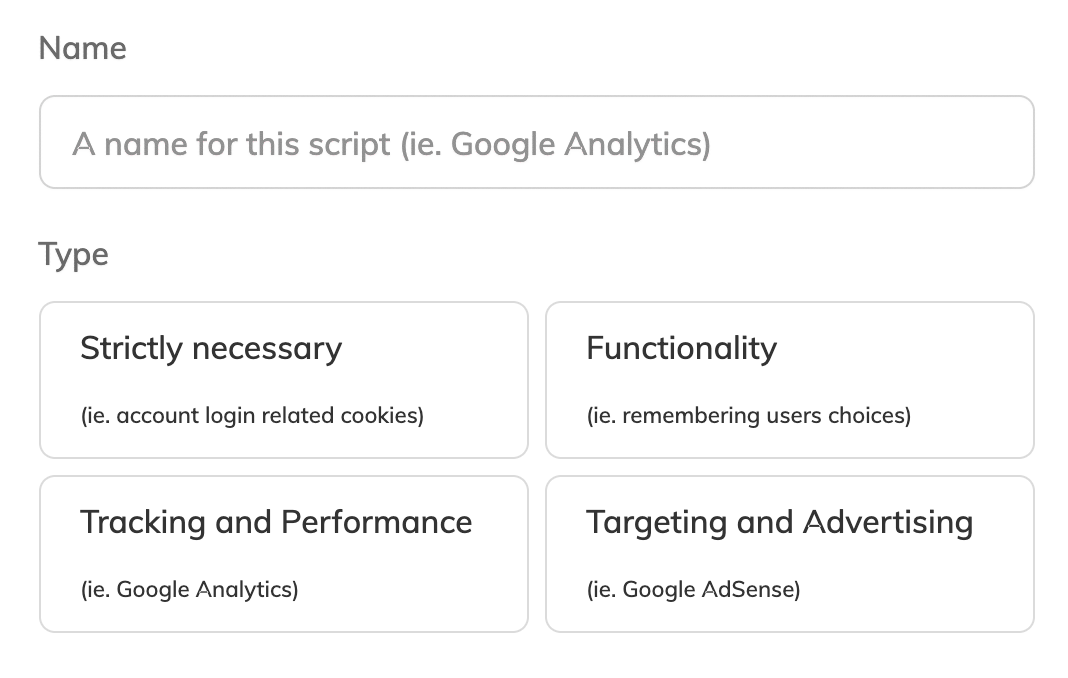
Add your JavaScript scripts
Copy-paste your JavaScript scripts on our Cookie Consent builder. Or you can tag your JavaScripts according to our instructions.

Step 4
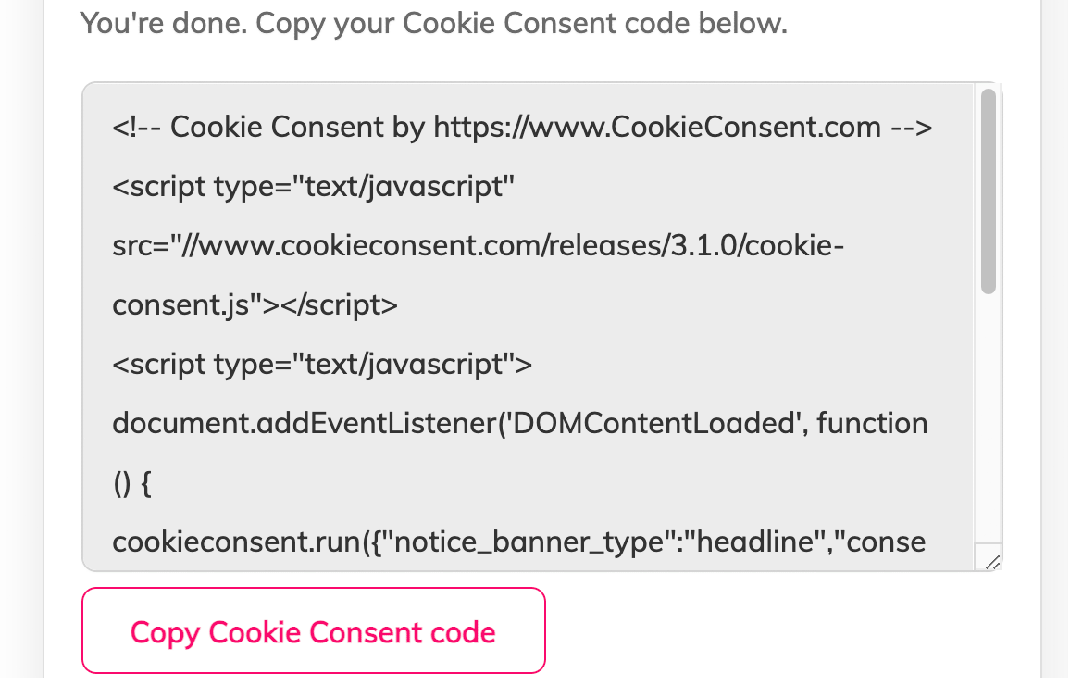
Copy the generated Cookie Consent code
You're done. The Cookie Consent banner notice code has been generated. Copy it.

Step 5
Add your Cookie Consent code on your website
Copy the generated Cookie Consent on your website webpages in the <body> section.
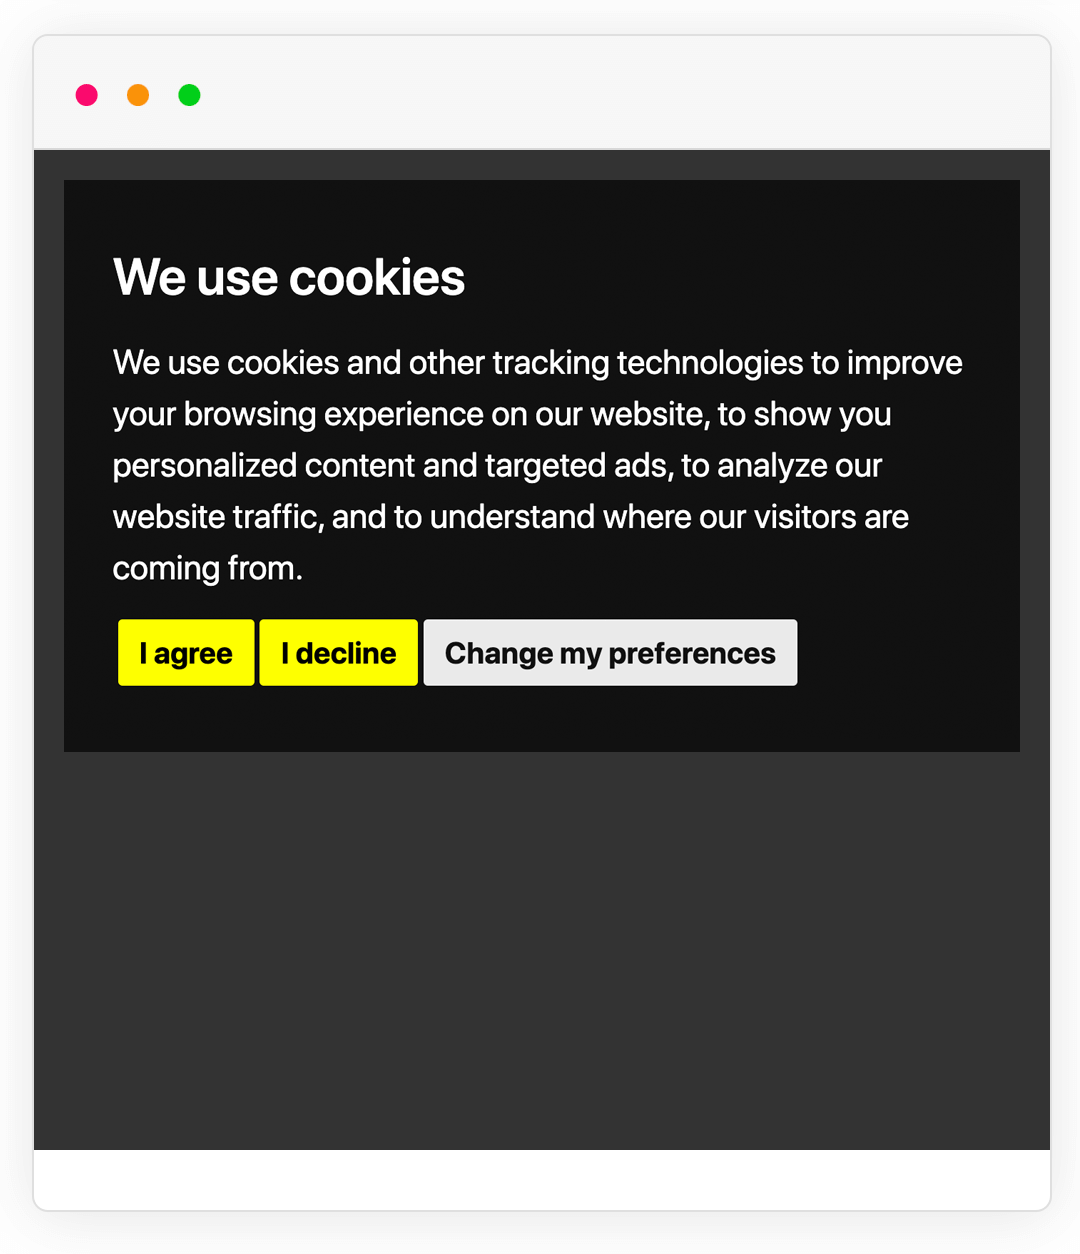
Cookie Consent screenshots

Example of Cookie Consent with ePrivacy Directive consent preference.

Example of Cookie Consent with GDPR consent preference.

Example of Cookie Consent notice banner in a different color palette.

Example of Cookie Consent notice banner in a different language.

Example of Cookie Consent notice banner in a different style for the banner.
Cookie Consent video tutorials
How to tag your JavaScript scripts
Tag any JavaScript <script> that you're using by changing type="text/javascript" to type="text/plain".
Then add the corresponding consent level for each tagged <script>. For example: data-cookie-consent="functionality".
That's it.
Here's an example from Google Analytics and a Login Session script that's loaded with some necessary cookies:
<!-- Login Cookies -->
<script type="text/plain" data-cookie-consent="strictly-necessary" src="/js/login-session.js"></script>

<!-- Google Analytics -->
<script type="text/plain" data-cookie-consent="tracking">
(function(i,s,o,g,r,a,m){i['GoogleAnalyticsObject']=r;i[r]=i[r]||function(){
(i[r].q=i[r].q||[]).push(arguments)},i[r].l=1*new Date();a=s.createElement(o),
m=s.getElementsByTagName(o)[0];a.async=1;a.src=g;m.parentNode.insertBefore(a,m)
})(window,document,'script','//www.google-analytics.com/analytics.js','ga');
ga('create', GOOGLE_PROPERTY_ID_GOES_HERE, 'auto');
ga('send', 'pageview');
</script>
How to integrate Google Consent Mode V2
Google Consent Mode V2 can be easily integrated with Cookie Consent.
Create the gtag function with the default consent states as denied. Then, load the Google Analytics script. And then, using the callbacks functionality from Cookie Consent, update the consent states based on user acceptance.
The full instructions are below:
-
First, set the default consent states to denied.
<script> window.dataLayer = window.dataLayer || []; function gtag(){ dataLayer.push(arguments); } gtag('consent', 'default', { 'ad_storage': 'denied', 'ad_user_data': 'denied', 'ad_personalization': 'denied', 'analytics_storage': 'denied' }); </script> -
Load Google Analytics on your page without tagging it to a specific category. With the default consent states as denied, Google Analytics will adjust its behavior accordingly in order to preserve analytics measurement.
<script async src="https://www.googletagmanager.com/gtag/js?id=TAG_ID"></script>
<script>
	window.dataLayer = window.dataLayer || [];
	function gtag(){dataLayer.push(arguments);}

	gtag('js', new Date());
	gtag('config', 'TAG_ID');
</script>
-
Then, update your Cookie Consent config code to include a new parameter called
callbacksthat updates the consent states based on user consent."callbacks": { "scripts_specific_loaded": (level) => { switch(level) { case 'targeting': gtag('consent', 'update', { 'ad_storage': 'granted', 'ad_user_data': 'granted', 'ad_personalization': 'granted', 'analytics_storage': 'granted' }); break; } } }, "callbacks_force": true
At the end, your code should look like this:

Cookie Consent FAQs
What is Cookie Consent?
Cookie Consent (cookieconsent.com) is a free cookies management solution by TermsFeed that you can integrate on your website that helps you comply with the EU Cookies Directive and GDPR.
Do I need Cookie Consent?
The general rule is this: if you use cookies on your website, you need Cookie Consent. For example, if you use Google Analytics, you need Cookie Consent. If you have use JavaScript code on your website that may store or retrieve cookies, you may need Cookie Consent.
Is Cookie Consent free?
Yes, Cookie Consent is 100% free.
How can I create a Cookie Consent banner notice?
Your Cookie Consent banner notice can be created by going through the builder steps above. At Step 1, choose your consent preference type. At Step 2, customize the banner notice by adding your website name and choosing a preferred language for the Cookie Consent.
How can I implement Cookie Consent?
Once you have generated your Cookie Consent banner notice, begin to organize all your JavaScripts by tagging them correctly using the available consent levels: strictly-necessary, functionality, tracking, targeting.
Is Google Consent Mode V2 supported by Cookie Consent?
Yes, you can easily integrate Google Consent Mode V2 with Cookie Consent. Set the consent states as denied, load the Google script and then use the callbacks from Cookie Consent to update the consent states based on user acceptance.
How can I edit the text from the Cookie Consent notice banner?
You can use the notice_banner_purposes_levels parameter in the config code to control if certain categories are visible inside the notice banner text (as purposes text) and inside the Preferences Center (as tabs).
Does the Cookie Consent include consent log functionality?
Upon giving consent, a new cookie named cookie_consent_user_consent_token is created. It includes a random string that can be used to identify the consent given.
We do not provide consents storage! We suggest to try out our paid Cookie Consent solution, called Privacy Consent, that includes automatic geo-location functionality, consent log functionality and storage (with downloadable CSV files) and more features for GDPR, CCPA.
You can also pass your own identifier string (instead on relying on Cookie Consent to automatically generate it) by inserting a new parameter in the config code: user_consent_token. Example: "user_consent_token": "STRING_GOES_HERE".
How can I use the Cookie Consent across multiple subdomains?
You can integrate Cookie Consent to work across multiple subdomains of the same root domain by inserting the domain parameter in the config code.
Example: "cookie_domain": "thisismydomain.com"
Please make sure you enter the correct domain when using this parameter. Otherwise, the Cookie Consent will not work properly.
How can I load the Cookie Consent only for EU (Europe) visitors?
Currently, our free Cookie Consent version does not include any geo-location functionality. We suggest to try out our paid Cookie Consent solution, called Privacy Consent, that includes automatic geo-location (ie. notice banner loaded only for EU users or if you're based in the EU).
My app is SPA (single-page application). How can I open the Preferences Center?
For single-page applications (SPAs) you can open the Preferences Center using the openPreferencesCenter() method.
Example: <button onclick="cookieconsent.openPreferencesCenter();">Open Preferences Center</button>
Why do I see weird characters in the Cookie Consent notice banner when using different languages?
You may see weird characters in the Cookie Consent notice banner if your HTML page does not have the meta charset tag added.

You can fix this by adding the charset="UTF-8" parameter:
- In the
headsection of your webpages add:<meta charset="utf-8" /> - Add the generated Cookie Consent code in the
bodysection of your webpages - Modify the first line of the generated code to add a new
charset="UTF-8"parameter:<script type="text/javascript" charset="UTF-8" src="//.....
You should also make sure that your code/text editor saves your webpages in UTF-8 and your web server (Apache, nginx) sets the correct encoding.
Cookie Consent documentation
Installation
- Generate the Cookie Consent build configuration code by going through the steps above - Start building your Cookie Consent today.
- Copy the generated code on your website right after the
<body>tag or before the</body>.
Usage
In order for the Cookie Consent tool to run correctly, you need to "tag" your JS scripts:
- For any
<script>you want to tag, changetype="text/javascript"totype="text/plain". Iftype="text/javascript"is not available, addtype="text/plain". - On the same
<script>, add in the corresponding cookie level. For example:data-cookie-consent="functionality".
Here's an example:
<!-- Login Cookies -->
<script type="text/plain" data-cookie-consent="strictly-necessary" src="/js/login-session.js"></script>

<!-- Google Analytics -->
<script type="text/plain" data-cookie-consent="tracking">
(function(i,s,o,g,r,a,m){i['GoogleAnalyticsObject']=r;i[r]=i[r]||function(){
(i[r].q=i[r].q||[]).push(arguments)},i[r].l=1*new Date();a=s.createElement(o),
m=s.getElementsByTagName(o)[0];a.async=1;a.src=g;m.parentNode.insertBefore(a,m)
})(window,document,'script','//www.google-analytics.com/analytics.js','ga');
ga('create', GOOGLE_PROPERTY_ID_GOES_HERE, 'auto');
ga('send', 'pageview');
</script>
Design
You can apply your own style for the Cookie Consent by writing your own CSS to overwrite the CSS of Cookie Consent.
Use Developer Tools > Inspect Element to identify the element you want to customize and style differently. Then write your own CSS rules to overwrite the style of the element. For example, if you'd like to make the title of the notice banner red then:
.termsfeed-com---nb .cc-nb-title {
  color: red !important;
}
Methods
The following methods are available for the Cookie Consent:
| Name | Description |
|---|---|
|
|
The |
|
|
The |
Configuration options
The following configurations are available for the Cookie Consent that can be used with the cookieconsent.run() method:
| Name | Type | Default | Values | Description |
|---|---|---|---|---|
|
|
String |
|
|
Type of consent to apply.
|
|
|
String |
|
|
Color palette to apply. |
|
|
String |
|
Please see builder steps above for all available languages. |
Language for the text inside the notice banner and Preferences Center. |
|
|
String |
|
|
Type of notice banner design to apply. Please see builder steps above for a preview of these banner types. |
|
|
Boolean |
|
|
Hides the "I Reject" (I Decline) button in the notice banner. |
|
|
Boolean |
|
|
Appends the legal URLs (Privacy Policy and/or Impressum) in the notice banner text. |
|
|
String |
|
|
Location where to insert the Cookie Consent HTML elements. |
|
|
Array |
|
Categories of purposes mentioned in the notice banner text and corresponding tabs in Preferences Center. |
|
|
|
Boolean |
|
|
Hides the close button (top right) in Preferences Center. |
|
|
Array |
|
|
Categories of tagged scripts to load on page load regardless of By default, the configuration code will insert only |
|
|
String |
|
|
The ID of the button/link to open the Preferences Center. |
|
|
Boolean |
|
|
Refreshes the page once the user clicks "I Agree", "I Reject" or "Save" button from Preference Center. |
|
|
String |
|
|
Sets the URL to the Privacy Policy. It appears in the Preferences Center > More Information tab. It would appear in the notice banner text only if |
|
|
String |
|
|
Sets the URL to the Impressum page. It would appear in the notice banner text only if |
|
|
String |
|
|
By default, Cookie Consent will generate a user consent token that you can use to retrieve an identifiable consent given by a user. Use We suggest to try out our paid Cookie Consent solution, called Privacy Consent, that includes automatic geo-location functionality, consent log functionality and storage (with downloadable CSV files) and more features for GDPR, CCPA. |
|
|
String |
|
|
Sets the domain when creating the cookies necessary for Cookie Consent to run properly. If Do not set |
|
|
Integer |
|
|
Sets the number of days when the cookies set by Cookie Consent expire. Default is 365 days. Maximum value is 400 (capped by web browsers, see Chrome release M104 in Aug 2022). |
|
|
|
You can use Supported events are:
Example of callbacks code: You can use function names instead of code to fire your own functions: "callbacks": {
"scripts_specific_loaded": "my_function_for_scripts_specific_loaded"
}
Callbacks are fired only if tagged scripts are found on page. Otherwise, to fire callbacks when consent category is accepted without any tagged scripts on page, add |
||
|
|
Boolean |
|
|
Fires callbacks even if no tagged scripts are found on the page (fires when the consent category is accepted regardless if tagged scripts are assigned). |


