Assign Azure roles using the Azure portal

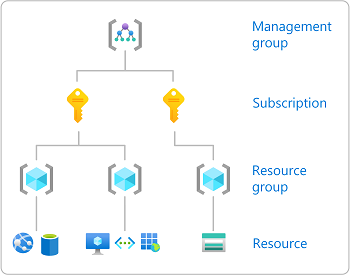
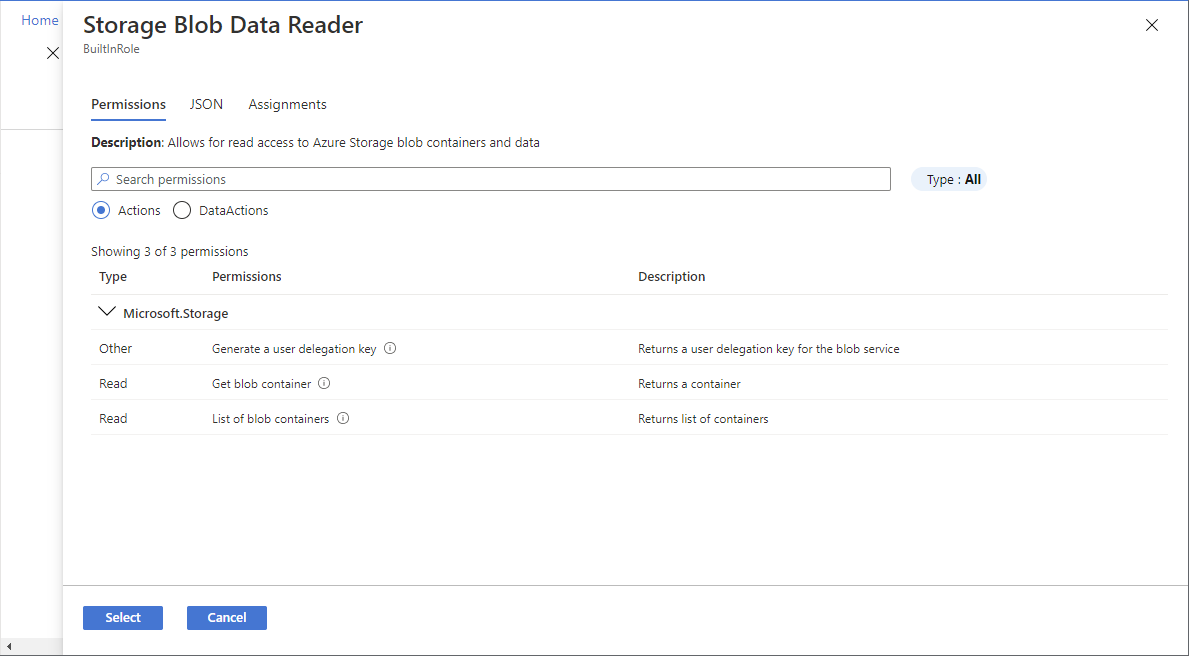
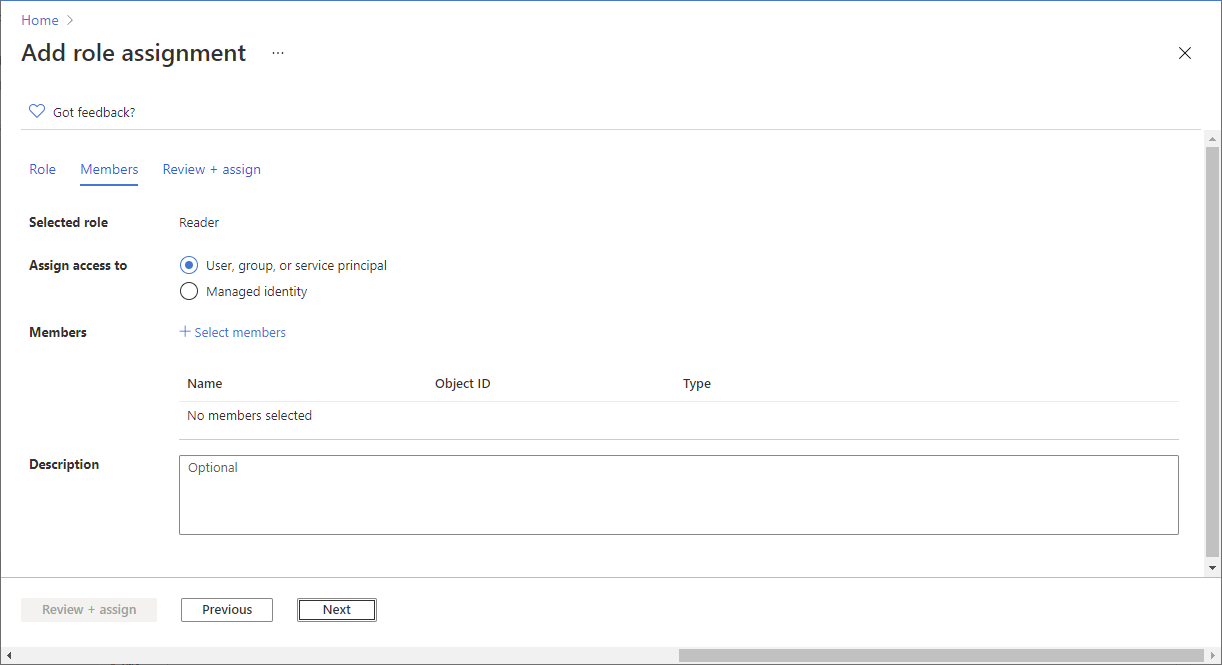
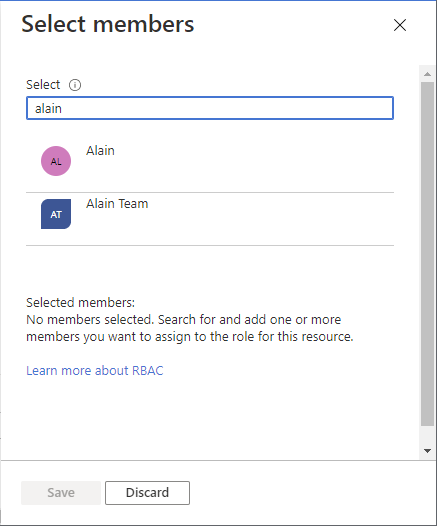
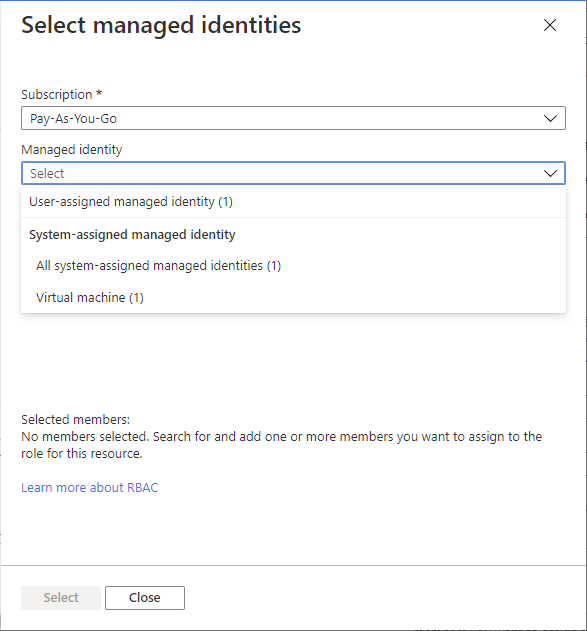
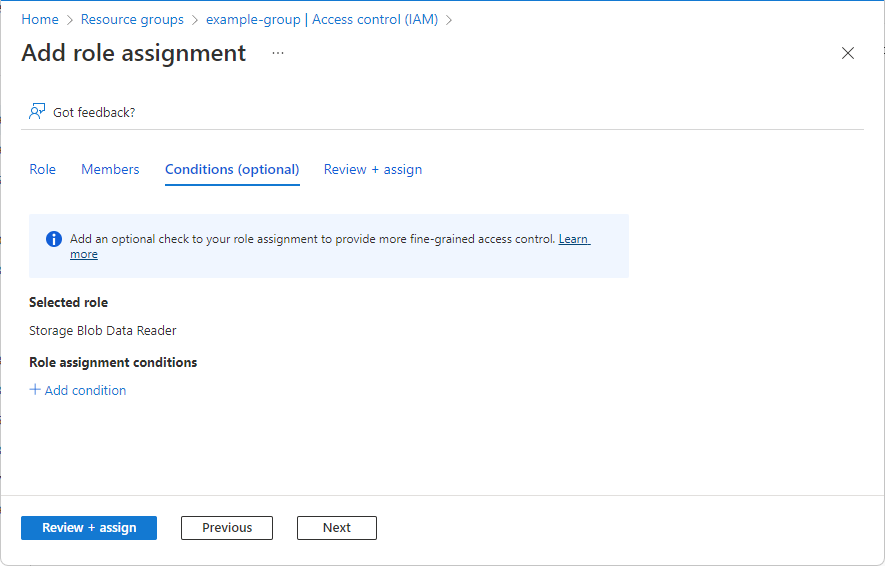
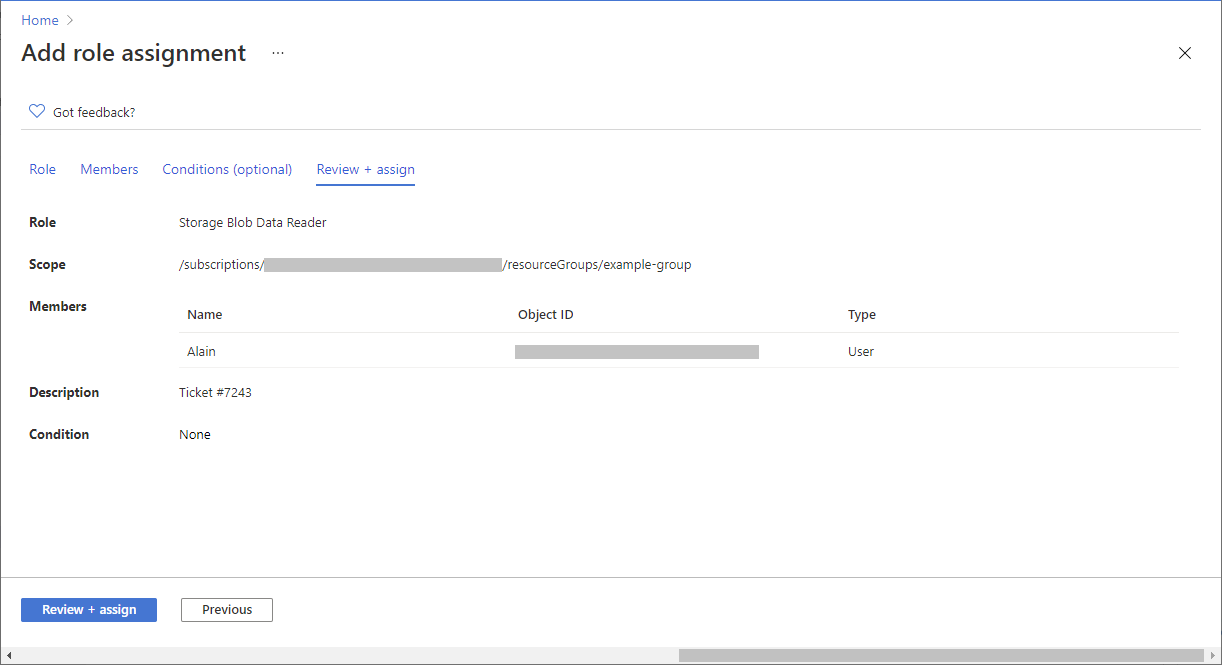
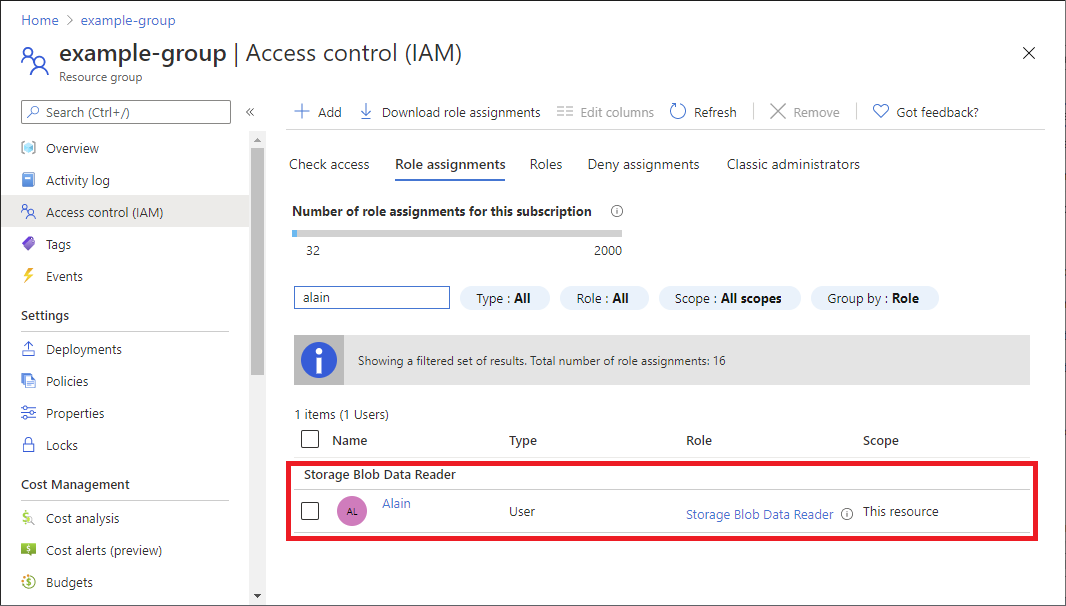
Azure role-based access control (Azure RBAC) is the authorization system you use to manage access to Azure resources. To grant access, you assign roles to users, groups, service principals, or managed identities at a particular scope. This article describes how to assign roles using the Azure portal.

If you need to assign administrator roles in Microsoft Entra ID, see Assign Microsoft Entra roles to users.

Prerequisites

To assign Azure roles, you must have:

Step 1: Identify the needed scope

When you assign roles, you must specify a scope. Scope is the set of resources the access applies to. In Azure, you can specify a scope at four levels from broad to narrow: management group, subscription, resource group, and resource. For more information, see Understand scope.

Diagram that shows the scope levels for Azure RBAC.

  1. Sign in to the Azure portal.

  2. In the Search box at the top, search for the scope you want to grant access to. For example, search for Management groups, Subscriptions, Resource groups, or a specific resource.

  3. Click the specific resource for that scope.

    The following shows an example resource group.

    Screenshot of resource group overview page.

Step 2: Open the Add role assignment page

Access control (IAM) is the page that you typically use to assign roles to grant access to Azure resources. It's also known as identity and access management (IAM) and appears in several locations in the Azure portal.

  1. Click Access control (IAM).

    The following shows an example of the Access control (IAM) page for a resource group.

    Screenshot of Access control (IAM) page for a resource group.

  2. Click the Role assignments tab to view the role assignments at this scope.

  3. Click Add > Add role assignment.

    If you don't have permissions to assign roles, the Add role assignment option will be disabled.

    Screenshot of Add > Add role assignment menu.

    The Add role assignment page opens.

Step 3: Select the appropriate role

To select a role, follow these steps:

  1. On the Role tab, select a role that you want to use.

    You can search for a role by name or by description. You can also filter roles by type and category.

    Screenshot of Add role assignment page with Role tab.

  2. If you want to assign a privileged administrator role, select the Privileged administrator roles tab to select the role.

    For best practices when using privileged administrator role assignments, see Best practices for Azure RBAC.

    Screenshot of Add role assignment page with Privileged administrator roles tab selected.

  3. In the Details column, click View to get more details about a role.

    Screenshot of View role details pane with Permissions tab.

  4. Click Next.

Step 4: Select who needs access

To select who needs access, follow these steps:

  1. On the Members tab, select User, group, or service principal to assign the selected role to one or more Microsoft Entra users, groups, or service principals (applications).

    Screenshot of Add role assignment page with Members tab.

  2. Click Select members.

  3. Find and select the users, groups, or service principals.

    You can type in the Select box to search the directory for display name or email address.

    Screenshot of Select members pane.

  4. Click Select to add the users, groups, or service principals to the Members list.

  5. To assign the selected role to one or more managed identities, select Managed identity.

  6. Click Select members.

  7. In the Select managed identities pane, select whether the type is user-assigned managed identity or system-assigned managed identity.

  8. Find and select the managed identities.

    For system-assigned managed identities, you can select managed identities by Azure service instance.

    Screenshot of Select managed identities pane.

  9. Click Select to add the managed identities to the Members list.

  10. In the Description box enter an optional description for this role assignment.

    Later you can show this description in the role assignments list.

  11. Click Next.

Step 5: (Optional) Add condition

If you selected a role that supports conditions, a Conditions tab will appear and you have the option to add a condition to your role assignment. A condition is an additional check that you can optionally add to your role assignment to provide more fine-grained access control.

The Conditions tab will look different depending on the role you selected.

Delegate condition

If you selected one of the following privileged roles, follow the steps in this section.

  1. On the Conditions tab under What user can do, select the Allow user to only assign selected roles to selected principals (fewer privileges) option.

    Screenshot of Add role assignment with the Constrained option selected.

  2. Click Select roles and principals to add a condition that constrains the roles and principals this user can assign roles to.

  3. Follow the steps in Delegate Azure role assignment management to others with conditions.

Storage condition

If you selected one of the following storage roles, follow the steps in this section.

  1. Click Add condition if you want to further refine the role assignments based on storage attributes.

    Screenshot of Add role assignment page with Add condition tab.

  2. Follow the steps in Add or edit Azure role assignment conditions.

Step 6: Select assignment type (Preview)

Important

Azure role assignment integration with Privileged Identity Management is currently in PREVIEW. See the Supplemental Terms of Use for Microsoft Azure Previews for legal terms that apply to Azure features that are in beta, preview, or otherwise not yet released into general availability.

If you have a Microsoft Entra ID P2 or Microsoft Entra ID Governance license, an Assignment type tab will appear. Use eligible assignments to provide just-in-time access to a role. This capability is being deployed in stages, so it might not be available yet in your tenant or your interface might look different. For more information, see Integration with Privileged Identity Management (Preview).

  1. On the Assignment type tab, select the Assignment type.

    • Eligible - User must perform one or more actions to use the role, such as perform a multifactor authentication check, provide a business justification, or request approval from designated approvers. You can't create eligible role assignments for applications, service principals, or managed identities because they can't perform the activation steps.
    • Active - User doesn't have to perform any action to use the role.

    Screenshot of Add role assignment with Assignment type options displayed.

  2. Depending on your settings, for Assignment duration, select Permanent or Time bound.

    Select permanent if you want member to always be allowed to activate or use role. Select time bound to specify start and end dates. This option might be disabled if permanent assignments creation is not allowed by PIM policy.

  3. If Time bound is selected, set Start date and time and Start date and time to specify when user is allowed to activate or use role.

    It's possible to set the start date in the future. The maximum allowed eligible duration depends on your Privileged Identity Management (PIM) policy.

  4. (Optional) Use Configure PIM Policy to configure expiration options, role activation requirements (approval, multifactor authentication, or Conditional Access authentication context), and other settings.

    When you select the Update PIM policy link, a PIM page is displayed. Select Settings to configure PIM policy for for roles. For more information, see Configure Azure resource role settings in Privileged Identity Management.

  5. Click Next.

Step 7: Assign role

Follow these steps:

  1. On the Review + assign tab, review the role assignment settings.

    Screenshot of Assign a role page with Review + assign tab.

  2. Click Review + assign to assign the role.

    After a few moments, the security principal is assigned the role at the selected scope.

    Screenshot of role assignment list after assigning role.

  3. If you don't see the description for the role assignment, click Edit columns to add the Description column.

Edit assignment (Preview)

Important

Azure role assignment integration with Privileged Identity Management is currently in PREVIEW. See the Supplemental Terms of Use for Microsoft Azure Previews for legal terms that apply to Azure features that are in beta, preview, or otherwise not yet released into general availability.

If you have a Microsoft Entra ID P2 or Microsoft Entra ID Governance license, you can edit your role assignment type settings. For more information, see Integration with Privileged Identity Management (Preview).

  1. On the Access control (IAM) page, click the Role assignments tab to view the role assignments at this scope.

  2. Find the role assignment that you want to edit.

  3. In the State column, click the link, such as Eligible time-bound or Active permanent.

    The Edit assignment pane appears where you can update the role assignment type settings. The pane might take a few moments to open.

    Screenshot of Edit assignment pane with Assignment type options displayed.

  4. When finished, click Save.

    Your updates might take a while to be processed and reflected in the portal.