Location via proxy:   
[Report a bug]   [Manage cookies]                

The Banana Pi M5 Pro

I’m down with the first flu of the season, so I thought I’d write up my notes on the Banana Pi M5 Pro and how it’s fared as part of my increasingly eclectic collection of single-board computers in the post- age.

Disclaimer: Banana Pi sent me a review unit (for which I thank them), and this article follows my . This piece was written after a month of (remotely) daily driving the board and is based on my own experiences with it.

Also known as the ArmSoM Sige5, this is a board along the lines of the I reviewed , and which I wanted to take a look at to get a better feeling for how its (theoretically) slower RK3576 chipset would perform.

This means there will be a lot of comparisons to the in this review, so if you’re interested in that board, you might want to read first.

Hardware

The Banana Pi M5 Pro
The Banana Pi M5 Pro - very, very familiar territory

Again, the general theme of the board is that it’s a little brother to the I reviewed earlier:

  • The CPU is a RK3576 with [email protected] and [email protected], and a 6 TOPS NPU, which is quite similar to the RK3588. The GPU, however, is a Mali G52, which is a little slower.
  • Like with the , you get an underside M.2 2280 PCIe NVMe slot, but it’s 1xPCIe 2.0 only (still speedy, but not as fast as the one on the )
  • The Ethernet ports are gigabit instead of 2.5Gb, although wireless connectivity is the same (802.11a/b/g/n/ac/ax WIFI6 and BT 5.0)
  • Most of the other connectors on the board (MIPI, CSI, DSI, GPIOs, etc.) are the same as the .
  • My board came with “only” 8GB of RAM (although you can get it up to 16GB) and a 64GB eMMC

I was sad that the 16GB model wasn’t available at the time, since that would have made for a better comparison to the .

But, as it is, at least connector-wise the board looks like a decent drop-in replacement for the for less demanding industrial applications.

Operating System Support

As you would expect, the board has great support–unlike the it’s not listed as “platinum” supported, but I had zero issues getting a fully up to date working image, and over the past month I have gotten regular updates from the rk35xx vendor branch, so as of this writing I’m running kernel 6.1.75:

   _             _    _                                         _ _
   /_\  _ _ _ __ | |__(_)__ _ _ _    __ ___ _ __  _ __ _  _ _ _ (_) |_ _  _
  / _ \| '_| '  \| '_ \ / _` | ' \  / _/ _ \ '  \| '  \ || | ' \| |  _| || |
 /_/ \_\_| |_|_|_|_.__/_\__,_|_||_|_\__\___/_|_|_|_|_|_\_,_|_||_|_|\__|\_, |
                                 |___|                                 |__/
 v24.11 rolling for ArmSoM Sige5 running Armbian Linux 6.1.75-vendor-rk35xx

 Packages:     Debian stable (bookworm)
 Support:      for advanced users (rolling release)
 IP addresses: (LAN) 192.168.1.111 192.168.1.168 (WAN) 161.230.X.X

 Performance:

 Load:         3%               Up time:       0 min
 Memory usage: 2% of 7.74G
 CPU temp:     43°C             Usage of /:    17% of 57G

 Tips:

 Support our work and become a sponsor https://github.com/sponsors/armbian

 Commands:

 System config  : sudo armbian-config
 System monitor : htop

Last login: Mon Sep 30 10:35:13 2024 from 192.168.1.160
me@black:~$ uname -a
Linux black 6.1.75-vendor-rk35xx #1 SMP Thu Aug  8 17:42:28 UTC 2024 aarch64 GNU/Linux

It was also trivial to set up my usual LXDE remote environment on it and working on it from my iPad, and I took the time to put myself through the paces of editing and building software on it, which was very smooth:
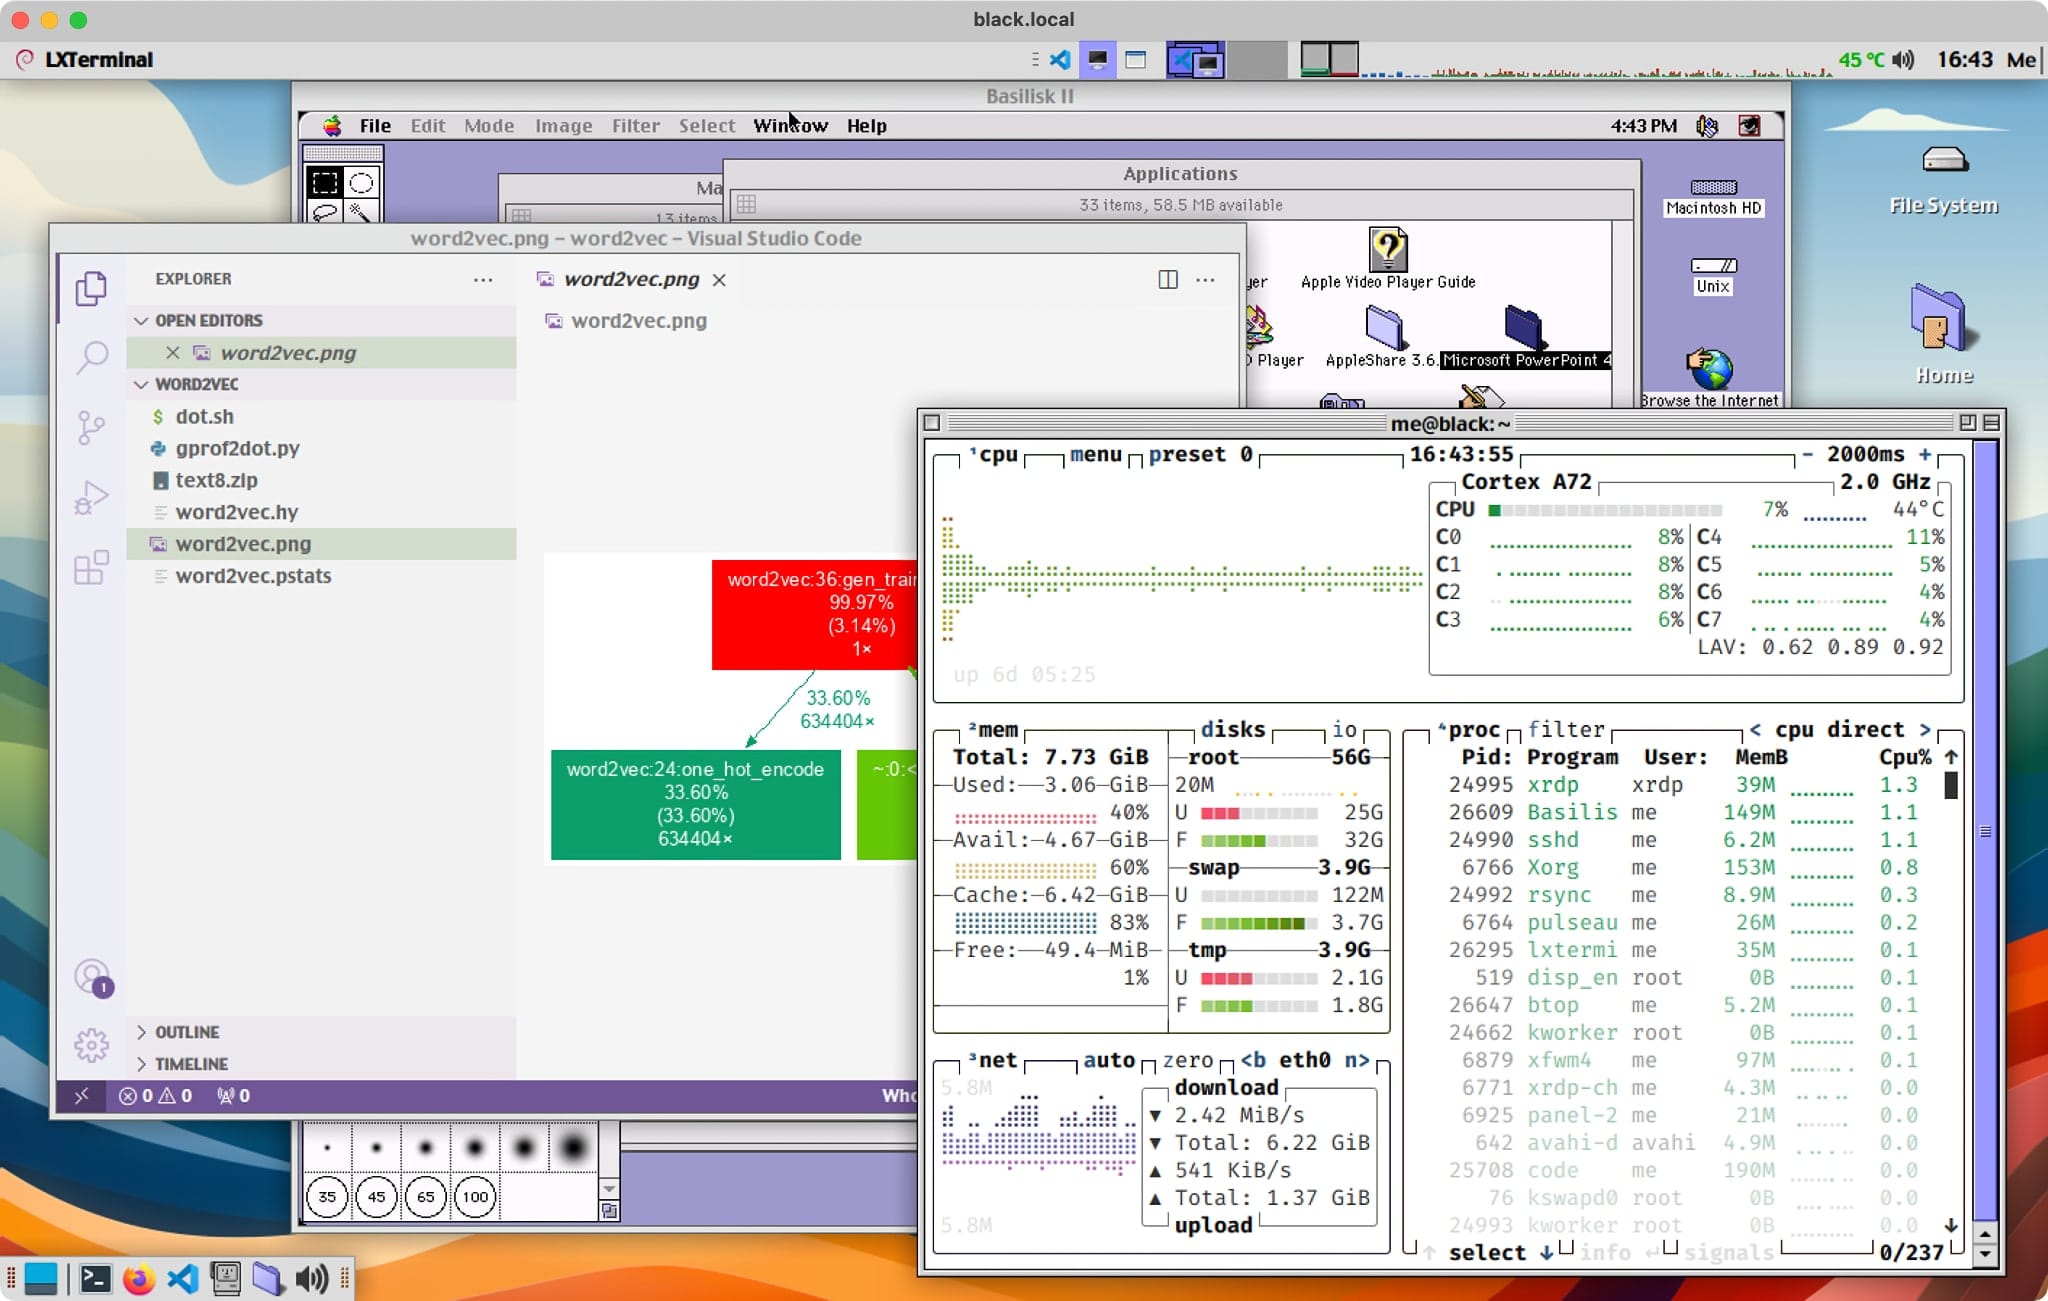
Remote Desktop to the Banana Pi M5 Pro
Yes, that's BasiliskII in the background, and word2vec. Color me eclectic.

Benchmarking

This time around I had to skip my NVMe testing since I had no spare SSDs–however, given that the NVMe slot is only PCIe 2.0, I would expect the IOPS figures to be only around a quarter of what the can do (i.e., 3000 IOPS), which would still be faster than a SATA SSD and thus more than enough for the vast majority of industrial use cases.

Also, I should point out that the stuff I ran had zero issues running off the EMMC, so I didn’t feel the need to push it to the limit.

Ollama

However, the ollama testing was more interesting than I expected.

for run in {1..10}; do echo "Why is the sky blue?" | ollama run tinyllama --verbose 2>&1 >/dev/null | grep "eval rate:"; done | \
awk '/^eval rate:/ {sum += $3; count++} END {if (count > 0) print "Average eval rate:", sum/count, "tokens/s"; else print "No eval rate found"}'

I was quite surprised when the M5 put out better results than the originally had (11.12 tok/s, which was better than the 10.3 I had gotten), so I plugged in the again, updated the kernel and ollama, and ran them again:

Machine Model Eval Tokens/s

Banana Pi M5 Pro

dolphin-phi 3.92
tinyllama 11.22

Banana Pi M7

dolphin-phi 5.73
tinyllama 15.37

…which goes to show you that all benchmarks should be taken with a grain of salt. There are several variants here:

  • Both systems are running a newer kernel than when I tested the
  • The is now in a matching case to the M5, so heat dissipation should be slightly improved (although that was not a big factor in earlier testing)
  • ollama has since been further optimized (even though it still doesn’t support the NPU on either system).

This seems like a good reason to try out sbc-bench when I get an NVMe drive to test with (it is, after all, a more static workload, and unlikely to be further optimized), but for now I’m happy with the results, and, again, I don’t really hold much stock in benchmark figures.

Update: I found the time to run sbc-bench on both boards, and here are the results:

Device / details Clockspeed Kernel Distro 7-zip multi 7-zip single AES memcpy memset kH/s
Banana Pi M5 Pro 2304/2208 MHz (throttled) 6.1 Armbian 24.11.0-trunk.190 bookworm 11870 1842 1310870 5740 16650 18.03
Banana Pi M7 2352/1800 MHz 6.1 Armbian 24.8.4 bookworm 16740 3170 1314240 12740 29750 -


As you can see, there is a significant difference in performance, but that’s both due to the differences in SOC bandwidth and compounded by the fact that the M5’s defaults seem to throttle it more aggressively.

Power and Cooling

In general, the M5 Pro’s power profile was pretty similar to the ’s but lower. The only thing I found odd was that the idle wattage (1.4W) was a little higher, but CPU governors might be the cause here.

In almost direct proportion with the compute performance, it peaked at 6.4W under heavy load (instead of the 10W I could get out of the ) and quickly went down to 5.7W when thermal throttling–so on average it will always spend less than the for generally similar (but slightly lower) performance, which makes its much lower pricing all the more interesting.

Since this time I got the aluminum case with the board (in a very discreet matte black), thermals were also directly comparable between both boards, but very predictable in this case:

Over several ollama runs, the reported CPU temperature peaked at 80oC, with the clock slowly throttling down from 1.8 to 1.6 and then 1.4GHz over 5 minutes (and bouncing right back up when the temp dipped below 79oC).

So I really liked the way this handled sustained load–the 400MHz drop isn’t nothing, but it’s quite acceptable.

Conclusion

First off, I need to spend a little more time with the M5 Pro to get a better feel for it–and yet the only thing that I really wish was that I’d gotten the 16GB RAM model, which would have made for a better comparison to the .

Considering all the above and the fact that during almost a month’s worth of testing (editing and building programs remotely on it) I had zero issues where it regards compatibility and responsiveness, I’d say the M5 Pro is a very nice, cost-effective alternative to the –like I mentioned above, you can probably use it as a drop-in replacement for most industrial applications, and unless you really need the additional networking and storage bandwidth, likely nobody will be the wiser.

I also need to take another look at the power envelope (I’m not really keen on almost 50% additional power draw on idle), but I suspect that’s fixable by tweaking CPU governors, so I’m not worried about it.

Notes on Bazzite, Steam Link, and Rebuilding my AI Sandbox

Gaming hasn’t exactly been one of my most intensive pastimes of late–it has its highs and lows, and typically tends to be more intensive in the cold seasons. But this year, with and my interest in preserving a time capsule of my high-performance Zelda setup, I decided to create a VM snapshot of it and (re)document the process.

Either way, these steps will yield a usable gaming VM inside that you can run either emulation or Steam on and stream games to anything in your home. Whether you actually want to do this is up to you.

Disclaimer: Let me be very clear on one thing: I am doing this because I really like playing some of my older games with massively improved quality1. And the sheer simplicity of the seamless transition between handheld, TV and (occasionally) my desktop Mac, not having to mess around with cartridges or dusting off my PlayStation. And also because, to be honest, Steam in the long run.

Background

From very early on, I’ve been using as a Steam Link server for my and my Apple TV, but I stopped running it on a VM because I needed the NVIDIA RTX 3060 in to do AI development, and you can’t really share a single GPU (in a single slot machine, to boot) across VMs without hard to maintain firmware hacks–although I did manage to .

In short, this isn’t my first rodeo with gaming VMs. It’s not even the .

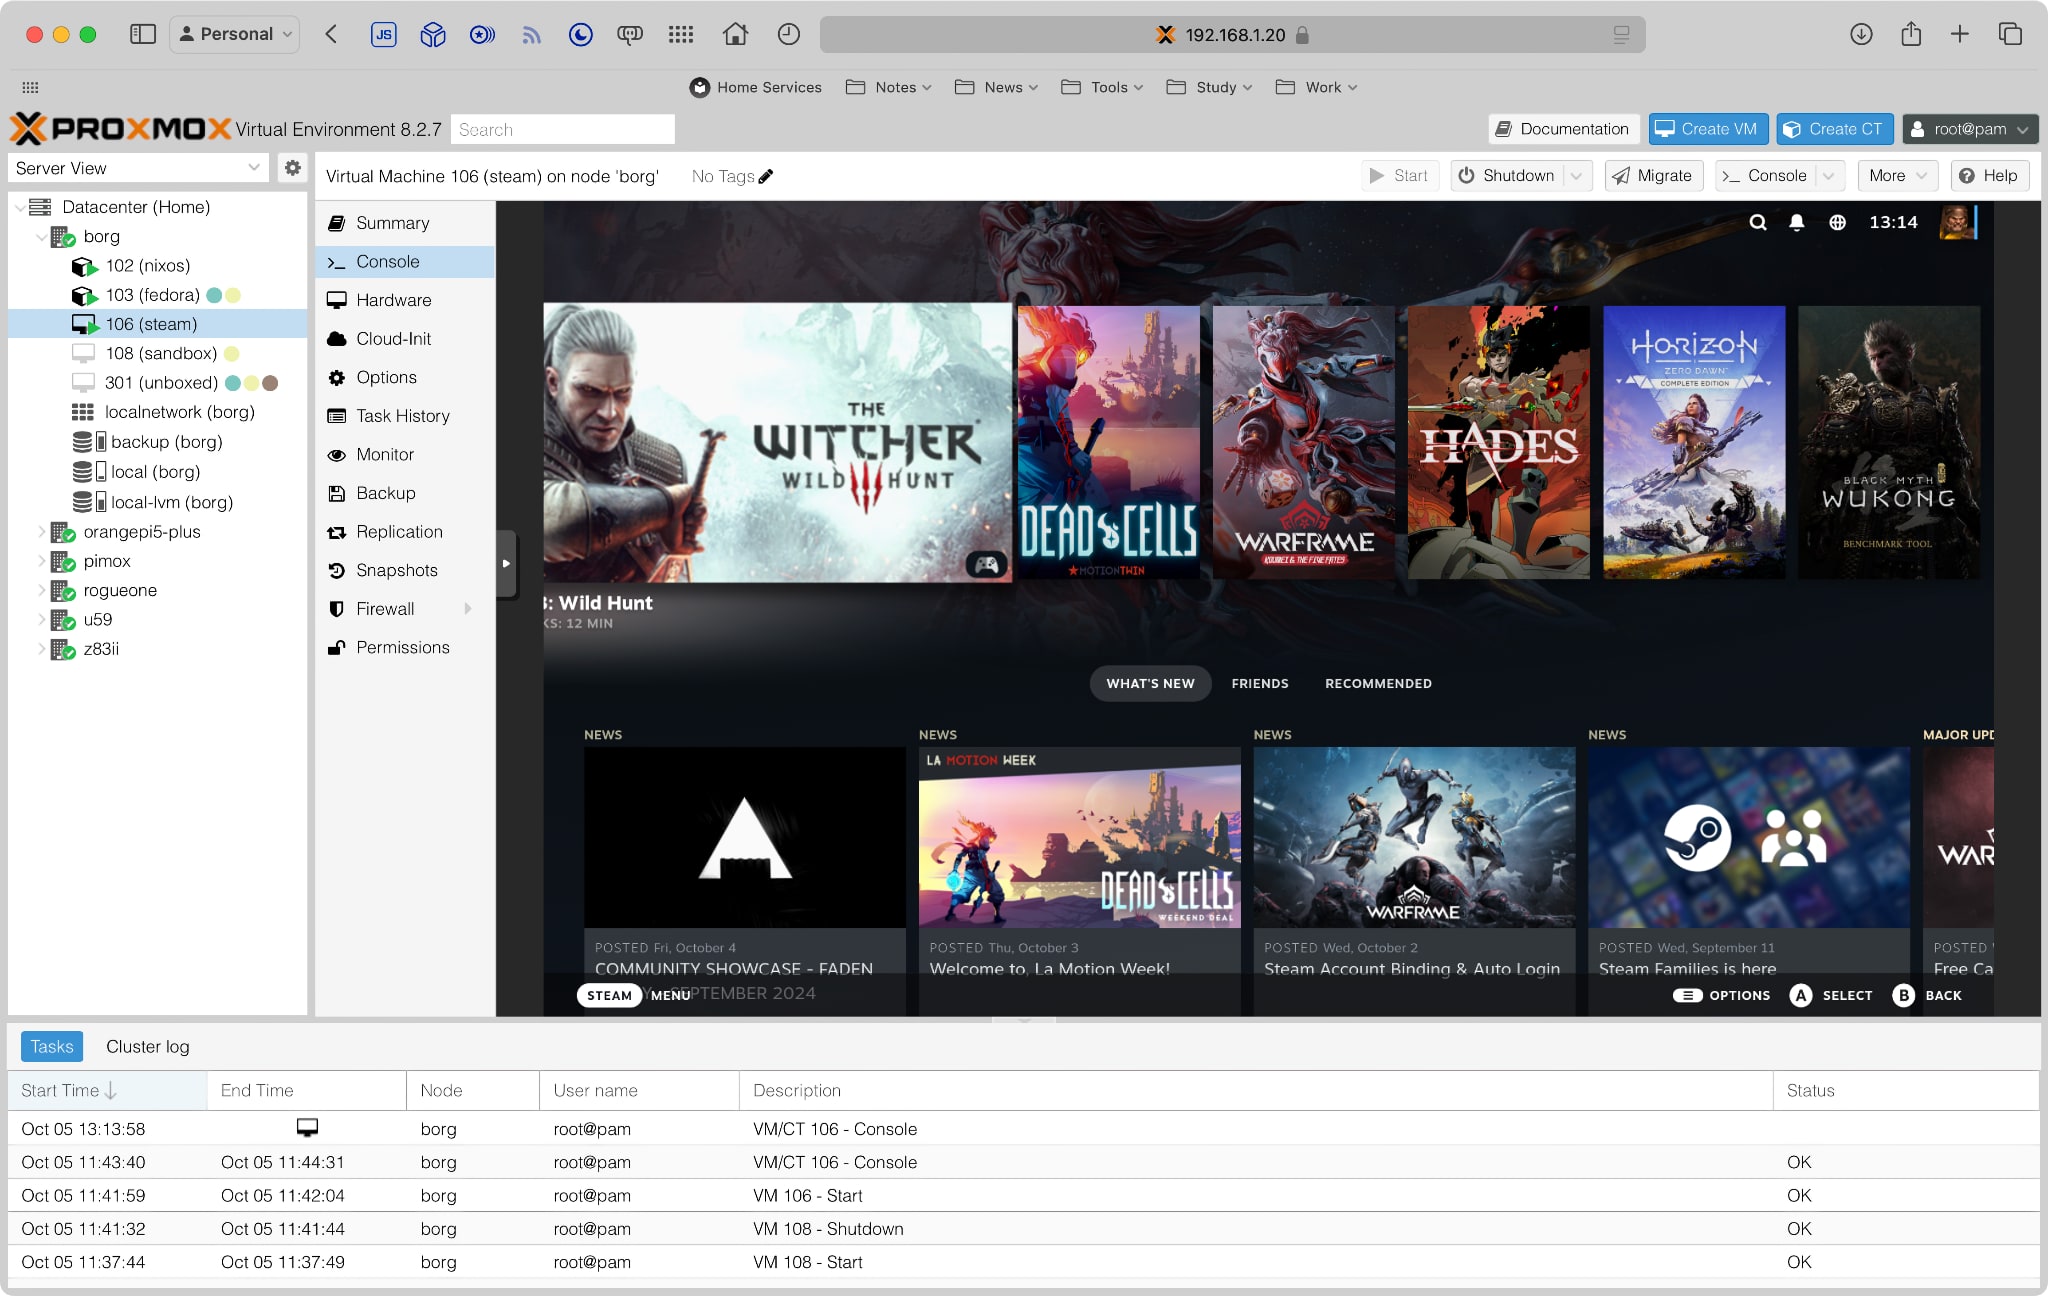
Proxmox console
You can also add the emulators to Steam, but I usually just boot to an emulation front-end.

If you’re new here (and to ), it’s a immutable OS that you can actually install on a Steam Deck and many gaming handhelds, and that I’ve been using since its earliest days. I run other Atomic spins (as they are called) on other machines, but is literally the simplest way to do Linux gaming, and actually had a VM set up to do exactly what I’m documenting on this post.

But really shines on modern Ryzen mini-PC hardware, so I moved most of my gaming to the . The only caveat was that I couldn’t do 4K streaming (which was actually fine, since in Summer I have less tendency to game on a TV).

However, I ended up deleting the Steam VM from , and now I had to set it up all over again–and this time I decided to note down most of the steps to save myself time should it happen yet again.

Installation

This part is pretty trivial. To begin with, I’ve found the GNOME image to be much less hassle than the KDE one, so I’ve stuck with it. Also, drivers are a big pain, as usual.

Here’s what I did in :

  • Download the ISO to your local storage–don’t use remote mount point like I did, it messes with the CD emulation.
  • Do not use the default bazzite-gnome-nvidia-open image, or if you do, rebase to the normal one with rpm-ostree rebase ostree-image-signed:docker://ghcr.io/ublue-os/bazzite-gnome-nvidia:stable as soon as possible–the difference in frame rates and overall snappiness is simply massive.

A key thing to get Steam to use the NVIDIA GPU inside the VM (besides passing through the PCI device) is to get rid of any other display adapters.

  • You can boot and install the ISO with a standard VirtIO display adapter, but make sure you switch that to a SPICE display later, which will allow you to have control over the console resolution.
  • Hit Esc or F2 when booting the virtual machine and go to Device Manager > OMVF Platform Configuration and set the console resolution to 1920x1080 upon boot. This will make a lot of things easier, since otherwise Steam Link will be cramped and blurry (and also confused as to what resolutions to use).
  • Install qemu-guest-agent with rpm-ostree install qemu-guest-agent --allow-inactive so that you can actually have ACPI-like control of the VM and better monitoring (including retrieving the VM’s IP address via the APIs for automation).

This is my current config:

# cat /etc/pve/qemu-server/106.conf 
meta: creation-qemu=9.0.2,ctime=1727998661
vmgenid: a6b5e5a1-cee3-4581-a75a-15ec79badb2e
name: steam
memory: 32768
cpu: host
cores: 6
sockets: 1
numa: 0
ostype: l26
agent: 1
bios: ovmf
boot: order=sata0;ide2;net0
smbios1: uuid=cca9442e-f3e1-4d75-b812-ebb6fcddf3b4
efidisk0: local-lvm:vm-106-disk-2,efitype=4m,pre-enrolled-keys=1,size=4M
sata0: local-lvm:vm-106-disk-1,discard=on,size=512G,ssd=1
scsihw: virtio-scsi-single
ide2: none,media=cdrom
net0: virtio=BC:24:11:88:A4:24,bridge=vmbr0,firewall=1
audio0: device=ich9-intel-hda,driver=none
rng0: source=/dev/urandom
tablet: 1
hostpci0: 0000:01:00,x-vga=1
vga: qxl
usb0: spice

I have bumped it up to 10 cores to run beefier PC titles, but for emulation and ML/AI work I’ve found 6 to be more than enough on the 12th gen i7 I’m using.

Post-Boot

will walk you through installing all sorts of gaming utilities upon startup. That includes RetroDECK, all the emulators you could possibly want (at least while they’re available), and (in my case) to automatically replicate my emulator game saves to my NAS.

Again, this is a good time to install qemu-guest-agent and any other packages you might need.

What you should do is to use one of the many pre-provided ujust targets to test the NVIDIA drivers (and nvidia-smi) in a terminal:

+-----------------------------------------------------------------------------------------+
| NVIDIA-SMI 560.35.03              Driver Version: 560.35.03      CUDA Version: 12.6     |
|-----------------------------------------+------------------------+----------------------+
| GPU  Name                 Persistence-M | Bus-Id          Disp.A | Volatile Uncorr. ECC |
| Fan  Temp   Perf          Pwr:Usage/Cap |           Memory-Usage | GPU-Util  Compute M. |
|                                         |                        |               MIG M. |
|=========================================+========================+======================|
|   0  NVIDIA GeForce RTX 3060        On  |   00000000:00:10.0 Off |                  N/A |
|  0%   45C    P8              5W /  170W |     164MiB /  12288MiB |      0%      Default |
|                                         |                        |                  N/A |
+-----------------------------------------+------------------------+----------------------+

+-----------------------------------------------------------------------------------------+
| Processes:                                                                              |
|  GPU   GI   CI        PID   Type   Process name                              GPU Memory |
|        ID   ID                                                               Usage      |
|=========================================================================================|
|    0   N/A  N/A      4801      G   /usr/libexec/Xorg                               4MiB |
|    0   N/A  N/A      5085    C+G   ...libexec/gnome-remote-desktop-daemon        104MiB |
+-----------------------------------------------------------------------------------------+

There’s a reason gnome-remote-desktop-daemon is running–we’ll get to that.

GNOME Setup

already adds Steam to Startup Applications after you log in (and you’ll want to either replace that with RetroDECK or set Steam to start in Big Picture mode), but to run this fully headless there’s a bit of tinkering you need to do in Settings.

  • Turn on auto-login (System > Users)
  • Turn off screen lock (it’s currently under Privacy and Security)
  • Open Extensions (you’ll notice that already has Caffeine installed to turn off auto suspend), go to Just Perfection > Behavior > Startup Status and make sure it is set to Desktop so that you don’t land into overview mode upon auto-login (it should, but if it doesn’t, you now know where to force it).

Remote Desktop

Also, you absolutely need an alternative way to get at the console besides –this is because you’ll need to do a fair bit of manual tweaking on some emulator front-ends, but mostly because you’ll want to input Steam Link pairing codes without jumping through all the hoops involved in logging into and getting to the console and also because Steam turns off Steam Link if you switch accounts, which is just… stupid.

So I decided to rely on GNOME’s nice new Remote Desktop support, which is actually over RDP (and with audio properly setup). This makes it trivial to access the console via my phone with a couple of taps, but there are a few kinks.

For starters, to get GNOME Remote Desktop to work reliably with auto-login (since that is what unlocks the keychain), you actually have to disable encryption for that credential. That entails installing Passwords and Keys and set the Default Keyring password to nothing.

Yes, this causes GNOME application passwords to be stored in plaintext–but you will not be using anything that relies on the GNOME keychain.

Once you’re done, it’s a matter of snapshotting the VM and storing the image safely.

Bugs

This setup has a critical usability bug, which is that I cannot get Steam Input to work with RetroDECK–I’ve yet to track down exactly why since Steam Input works on PC games and the virtual controllers show up in SDL tests (they just don’t provide inputs), but I have gotten around it using (which is another kettle of fish entirely).

I could try to run all of this on Windows, but… I don’t think so. The exact same setup works perfectly on the , so I just need to track down what is different inside the VM.

Shoehorning In an AI Sandbox

One of the side-quests I wanted to complete alongside this was to try to find a way to use ollama, PyTorch and whatnot on borg without alternating VMs.

As it turns out, ships with distrobox (which I can use to run an Ubuntu userland with access to the GPU) and podman (which I can theoretically use to replicate ).

This would ideally make it trivial to have just one VM hold all the GPU-dependent services and save me the hassle of automating to switch VMs between gaming and AI stuff.

(Again, , but it’s a bit too fiddly.)

However, trying to run an AI-intensive workload with Steam open has already hard locked the host, so I don’t think I can actually make it work with the current NVIDIA drivers in .

However, I got tantalizingly close.

Ubuntu Userland

The first part was almost trivial–setting up an Ubuntu userland with access to the NVIDIA GPU and all the mainstream stuff I need to run AI workloads.

# Create an Ubuntu sandbox distrobox create ubuntu --image docker.io/library/ubuntu:24.04

# Set up the NVIDIA userland distrobox enter ubuntu
📦[me@ubuntu ~]$ curl -fSsL https://developer.download.nvidia.com/compute/cuda/repos/ubuntu2404/x86_64/3bf863cc.pub | sudo gpg --dearmor | sudo tee /usr/share/keyrings/nvidia-drivers.gpg > /dev/null 2>&1
📦[me@ubuntu ~]$ echo 'deb [signed-by=/usr/share/keyrings/nvidia-drivers.gpg] https://developer.download.nvidia.com/compute/cuda/repos/ubuntu2404/x86_64/ /' | sudo tee /etc/apt/sources.list.d/nvidia-drivers.list

# Install the matching NVIDIA utilities to what Bazzite currently ships
📦[me@ubuntu ~]$ sudo apt install nvidia-utils-560

# Check that the drivers are working
📦[me@ubuntu ~]$ nvidia-smi
Sat Oct  5 11:26:30 2024
+-----------------------------------------------------------------------------------------+
| NVIDIA-SMI 560.35.03              Driver Version: 560.35.03      CUDA Version: 12.6     |
|-----------------------------------------+------------------------+----------------------+
| GPU  Name                 Persistence-M | Bus-Id          Disp.A | Volatile Uncorr. ECC |
| Fan  Temp   Perf          Pwr:Usage/Cap |           Memory-Usage | GPU-Util  Compute M. |
|                                         |                        |               MIG M. |
|=========================================+========================+======================|
|   0  NVIDIA GeForce RTX 3060        On  |   00000000:00:10.0 Off |                  N/A |
|  0%   43C    P8              5W /  170W |     164MiB /  12288MiB |      0%      Default |
|                                         |                        |                  N/A |
+-----------------------------------------+------------------------+----------------------+

+-----------------------------------------------------------------------------------------+
| Processes:                                                                              |
|  GPU   GI   CI        PID   Type   Process name                              GPU Memory |
|        ID   ID                                                               Usage      |
|=========================================================================================|
|    0   N/A  N/A      4801      G   /usr/libexec/Xorg                               4MiB |
|    0   N/A  N/A      5085    C+G   ...libexec/gnome-remote-desktop-daemon        104MiB |
+-----------------------------------------------------------------------------------------+

From here on out, Python and everything else just worked.

Portainer, Podman and Stacks

This is where things started to go very wrong–there’s no nvidia-docker equivalent for podman, so you have to use CDI.

Just migrating my Portainer stacks across wouldn’t work, since the options for GPU access are fundamentally different.

But I figured out how to get portainer/agent running:

# Get the RPMs to overlay onto Bazzite curl -s -L https://nvidia.github.io/libnvidia-container/stable/rpm/nvidia-container-toolkit.repo | \
  sudo tee /etc/yum.repos.d/nvidia-container-toolkit.repo
❯ rpm-ostree install nvidia-container-toolkit-base --allow-inactive

# create the CDI configuration  sudo nvidia-ctk cdi generate --output=/etc/cdi/nvidia.yaml
❯ nvidia-ctk cdi list
INFO[0000] Found 3 CDI devices
nvidia.com/gpu=0
nvidia.com/gpu=GPU-cb9db783-7465-139d-900c-bc8d6b6ced7c
nvidia.com/gpu=all

# Make sure we have a podman socket sudo systemctl enable --now podman

# start the portainer agent sudo podman run -d \
     -p 9001:9001 \
     --name portainer_agent \
     --restart=always \
     --privileged \
     -v /run/podman/podman.sock:/var/run/docker.sock:Z \
     --device nvidia.com/gpu=all \
     --security-opt=label=disable \
     portainer/agent:2.21.2

# ensure system containers are restarted upon reboot sudo systemctl enable --now podman-restart

The above took a little while to figure out, and yes, Portainer was able to manage stacks and individual containers–but, again, it couldn’t set the required extra flags for podman to talk to the GPU.

But I could start them manually, and they’d be manageable. Here are three examples:

# ollama
 podman run -d --replace \
    --name ollama \
    --hostname ollama \
    --restart=unless-stopped \
    -p 11434:11434 \
    -v /mnt/data/ollama:/root/.ollama:Z \
    --device nvidia.com/gpu=all \
    --security-opt label=disable \
    ollama/ollama:latest

# Jupyter
 podman run -d --replace \
    --name jupyter \
    --hostname jupyter \
    --restart=unless-stopped \
    -p 8888:8888 \
    --group-add=users \
    -v /mnt/data/jupyter:/home/jovyan:Z \
    --device nvidia.com/gpu=all \
    --security-opt label=disable \
    quay.io/jupyter/pytorch-notebook:cuda12-python-3.11

# InvokeAI (for load testing)
 podman run -d --replace \
    --name invokeai \
    --hostname invokeai \
    --restart=unless-stopped \
    -p 9090:9090 \
    -v /mnt/data/invokeai:/mnt/data:Z \
    -e INVOKEAI_ROOT=/mnt/data \
    -e HUGGING_FACE_HUB_TOKEN=<token> \
    --device nvidia.com/gpu=all \
    --security-opt label=disable \
    ghcr.io/invoke-ai/invokeai

However, I kept running into weird permission issues, non-starting containers and the occasional hard lock, so I decided to shelve this for now.

Pitfalls

Besides stability, I’m not sold on podman at all–at least not for setting up “permanent” services. Part of it is because making sure things are automatically restarted upon reboot is fiddly (and, judging from my tests, somewhat error-prone, since a couple of containers would sometimes fail to start up for no apparent reason), and partly because CDI feels like a stopgap solution.

Conclusion

This was a fun exercise, and now I have both a usable snapshot of the stuff I want and detailed enough notes on the setup to quickly reproduce it again in the future.

However, besides workload coexistence on the GPU, this still doesn’t make a lot of sense in practice and I seem to be doomed to automate shutting down Steam or RetroDECK when I want to work–it’s just simpler to improve the scripting to alternate between VMs, which has the additional benefit of resetting the GPU state between workloads.

Well, either that or doing some kind of hardware upgrade…


  1. And, also, because it’s taken me years to almost finish Breath of the Wild given I very much enjoy traipsing around Hyrule just to see the sights. ↩︎

Notes for... September

I’m starting to from the , but am still not fully there yet. Work remains far too much of a rollercoaster (mostly because I care too much, to be honest), and I’m still trying to find my footing.

3D Printing

I’ve become (too) intimately acquainted with the ’s extruder of late, largely because trying to print carbon fiber filament has led to a bunch of clogging–I’ve had to disassemble the toolhead six times in a day, and… well, let’s just say I’m not happy with the entire process.

SK1 toolhead disassembly
Seventeen screws. Fortunately only two bits required...

This and the fact that the printer now suddenly refuses to connect to my Wi-Fi in any stable manner (likely because there are more 2.4GHz access points around) has caused a number of delays in physical projects, but I’m still plugging away at them–and the rest, too.

Artificial Intelligence

I decided to take it slower. Trying to get models running in SBCs is fun, intricate and somewhat rewarding, but not a marketable skill when working in a company where people buy H100s by the truckload (most people don’t get why I’d spend time on it), so I’ve been focusing on having a bit more fun.

That means I’ve yet to spend any meaningful time with , and instead started dabbling with image generation again (using FLUX.1, which is all the rage now).

I’ve also looked into the status quo of audio and voice synthesis, but I’m not sure where I’m going with that–I feel the need to do something with , though. Feels like a waste not to.

General Computing

I’m trying to extricate myself from the rabbit hole I got myself into when I recently decided to “upgrade” to it, and will be posting some notes. But, in general, I’ve been pushing myself to get back into coding–consciously focusing on small things, quick returns and fun rather than banging my head against fancy toolchains and libraries since my return to work prevented me from doing anything else.

Heck, I’ve even written some more Hy, simply because three days after it finally reached 1.0 and I wanted to make sure none of my older code was broken.

Office Tweaks

With Autumn encroaching and my having to work both earlier and later, I decided to take my bias lighting to a whole different level. I had a pretty nice going for the past three years, but I needed more cold/warm white light to help me focus, so I dug around for some cheap Zigbee 2700-6500K, 18W bulbs (that also have RGB, but very dim) and some cheap light bars to put behind my monitors.

Everything else is still completely chaotic outside the line of sight of my camera and I really need to do something about the mess piled up on my electronics station, but at least I can now work in a well-lit desk without having to turn on the main lights.

Books and Games

Again, the best way to rekindle an interest has been to revisit old favorites–I’ve decided to re-read the Culture series by Ian M. Banks and persistently wheedled out as many bugs as I could from my setup, which has been a decent way to unwind–I can now fire up Steam Link on any of my devices and have almost exactly the same experience on RetroDECK hosted on the , and the focus required to do that has been a good way to keep my mind off things.

And, of course, I keep writing stuff. Notes, drafts, reviews, you name it–the quality is still somewhat uneven, but trending upwards.

The AURGA Viewer Wireless KVM

As much as I love virtualizing machines in my homelab and putting the hardware as far away from my desk as possible, the truth of the matter is that there always comes a time when you need “physical” access to the host to deal with boot issues, change BIOS configurations and other types of housekeeping–and regular remote access just won’t cut it in those times.

Read More...

Re-Surfacing

It’s been a harrowing .

Read More...

The Geniatech XPI-3566-Zero

Although most single-board computers these days ship in a “full” 3/4/5 “B” form-factor or larger, I have been on the lookout for Zero variants for a long time, and the Geniatech XPI-3566-Zero is the latest one I’ve tested.

Read More...

The iPhone 16 event

OK, fine. Since I upgraded , I was quite unfazed by Apple’s 2024 iteration on either the iPhone or the new watches (let alone AirPods), but there were a few things I liked–and some I didn’t.

Read More...

Notes for August 26-September 8

And so it came to pass that I took a break from writing (and most other things) for a couple of weeks, and now I’m back. Sort of.

Read More...

Archives3D Site Map