It's been about a year since OpenAI introduced GPTs—a way for users to build custom versions of ChatGPT without writing a single line of code.
Since then, I've made plenty of for-fun GPTs (but if my boss is reading this, I've also made very serious, all-business GPTs). For example, there was the one I made to help me learn the rules of the board game Wingspan; another to help me plan activities for a trip to Ireland; and the most important one of all: a GPT to tell me fun facts about otters.
If you're eager to make your own, here's a step-by-step beginner's guide on how to create a custom GPT.
Note: Building a custom GPT is available only to ChatGPT Plus and Enterprise users.
Table of contents:
What are GPTs?
GPTs are custom versions of ChatGPT created by OpenAI users. All you have to do is tell the GPT builder, in plain English, what you want to create, and the builder will take it from there. Custom GPTs can also browse the web, generate images using DALLE·3, and run code.
Confusingly, GPT also stands for Generative Pre-trained Transformer and refers to the family of AI models built by OpenAI. Why OpenAI didn't make a clearer distinction between GPT and custom GPTs is beyond me. But for the purposes of this article, GPT refers to the custom chatbots you can build.
Now back to custom GPTs.
Advantages of custom GPTs
While users with a ChatGPT Plus or Enterprise account can already customize ChatGPT responses with custom instructions, the GPT builder takes things a step further in two notable ways:
Create multiple custom GPTs. There are no limits to how many GPTs you can build, making it easy to toggle between chatbots and get the right kind of AI-powered support for the occasion. Custom instructions, on the other hand, limit you to one set of instructions per user.
Upload knowledge source files. Instead of copying and pasting text from every resource you want ChatGPT to consider when generating a response, you can upload knowledge files directly to your GPT builder, and it'll take care of the rest.
Share your GPT. After you've fine-tuned the GPT to your exact specifications, you can easily share it with others (as long as they have a ChatGPT Plus or Enterprise subscription)—but more on this later.
Note: As part of OpenAI's privacy controls, you can opt your account out of model training. This means OpenAI won't be able to access anything containing sensitive information, like your chat history and knowledge files, to train their models. But as with any generative AI, there's always a risk of data breaches, and ways for people to get access to your knowledge sources, so be careful about what you upload in the early days of this feature.
How to create a custom GPT
Here's the short version of how to build your own custom ChatGPT using OpenAI's GPT builder.
Go to chat.openai.com and log in.
In the side panel, click Explore GPTs.
Click Create.
Enter your instructions in the message bar of the Create page. Chat with the GPT builder until you get the results you want.
Click Configure to add advanced customizations to your AI assistant. For example, you can change your GPT's name, further refine the instructions, upload knowledge files, and set up actions.
Click Create, and select how you want to share your custom GPT.
Click Update.
Now let's take a closer look at the finer details of creating a custom GPT.
1. Log in to your OpenAI account
Before you get started, you must have a ChatGPT Plus or Enterprise account. Already have the required account type? Click Log in to start chatting.

If you're having trouble logging in, your best bet is to reload your page. For specific login issues, check out OpenAI's troubleshooting tips.
2. Create your custom GPT
In the side panel, click Explore GPTs.
Click Create.

The GPT builder will display a split screen: the Create panel is where you enter your prompts to build your chatbot; the Preview panel allows you to interact with your chatbot as you build, making it easier to determine how to refine it. Enter your instructions in the message bar of the Create page, and then press Enter or Return.

The GPT builder will then suggest a few things based on your instructions: a chatbot name, profile picture, and default conversation starters. In this example, I've asked the GPT builder to make a GPT to help me plan hikes for an upcoming trip to Utah.
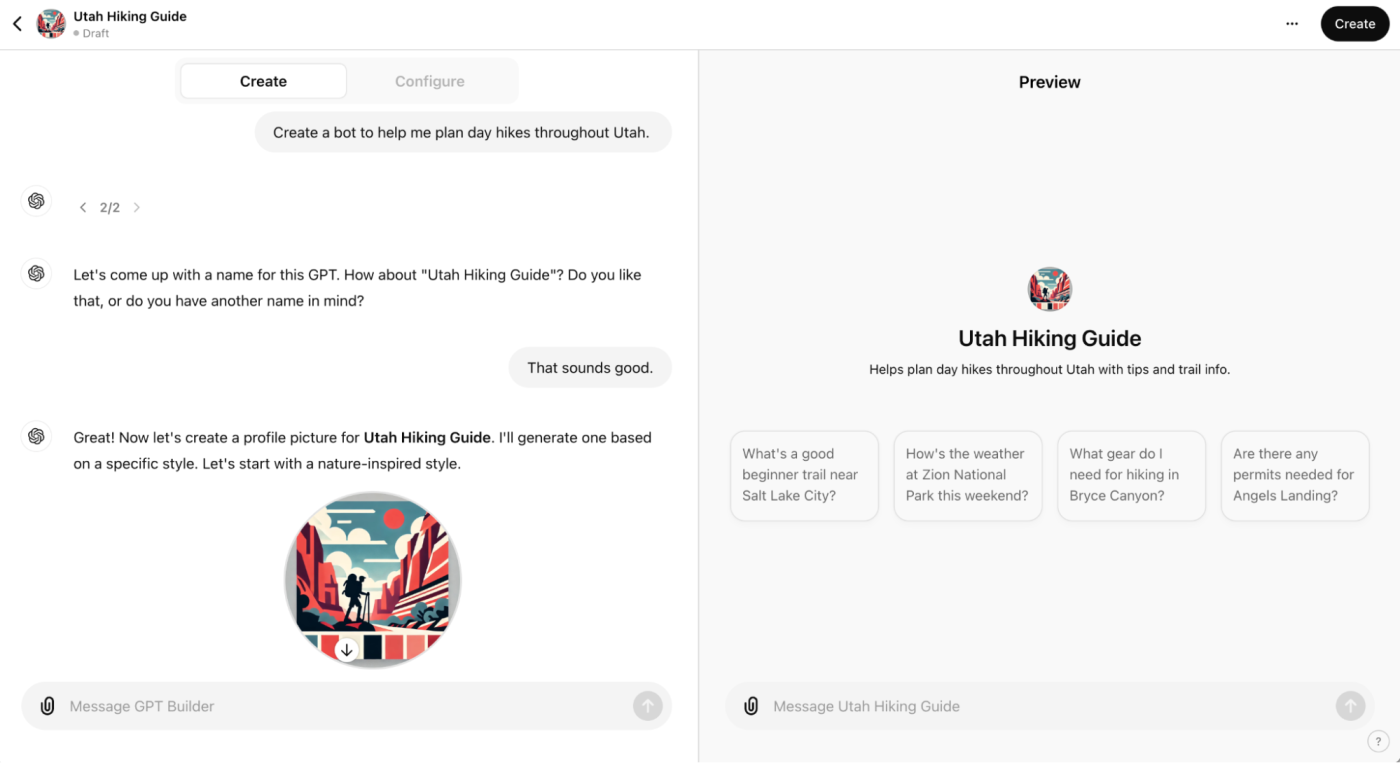
You can accept the initial suggestions or ask the GPT builder to modify them. If you accept the initial suggestions, you can always modify them later on.
The GPT builder will prompt you to enter more specific instructions to fine-tune your chatbot's behavior.

If you're not sure how you want to modify your chatbot's behavior, that's ok. My suggestion is to test your chatbot in the Preview panel—interact with it how you normally would—and use its responses to inform your modifications. For example, if your chatbot generates lengthy responses, you might tell the builder to keep the responses short. Or if the chatbot produces facts without citing its sources, you can tell it to always cite its sources.
Continue to refine your prompts until your chatbot starts to return the kinds of responses you want your final chatbot to generate.


3. Configure your custom GPT
Now that you've set up the basics, you can further customize your GPT with advanced settings.
Click Configure.
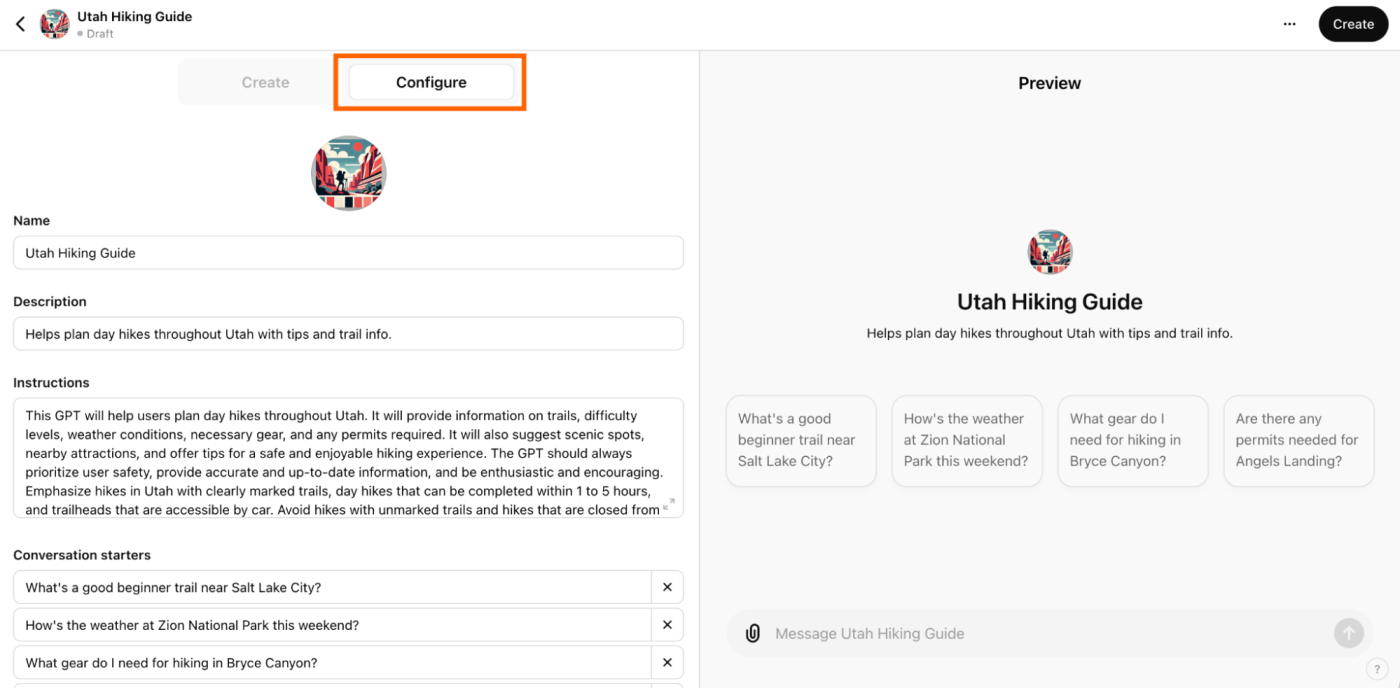
If you want, you can change your chatbot's name and description as you normally would. Here's how to modify the other advanced settings:

Profile picture. Click the profile picture. You can upload your own photo or use DALL·E to automatically generate a new one. If you want to specify what kind of image DALL·E should create, click Create, and enter your instructions.

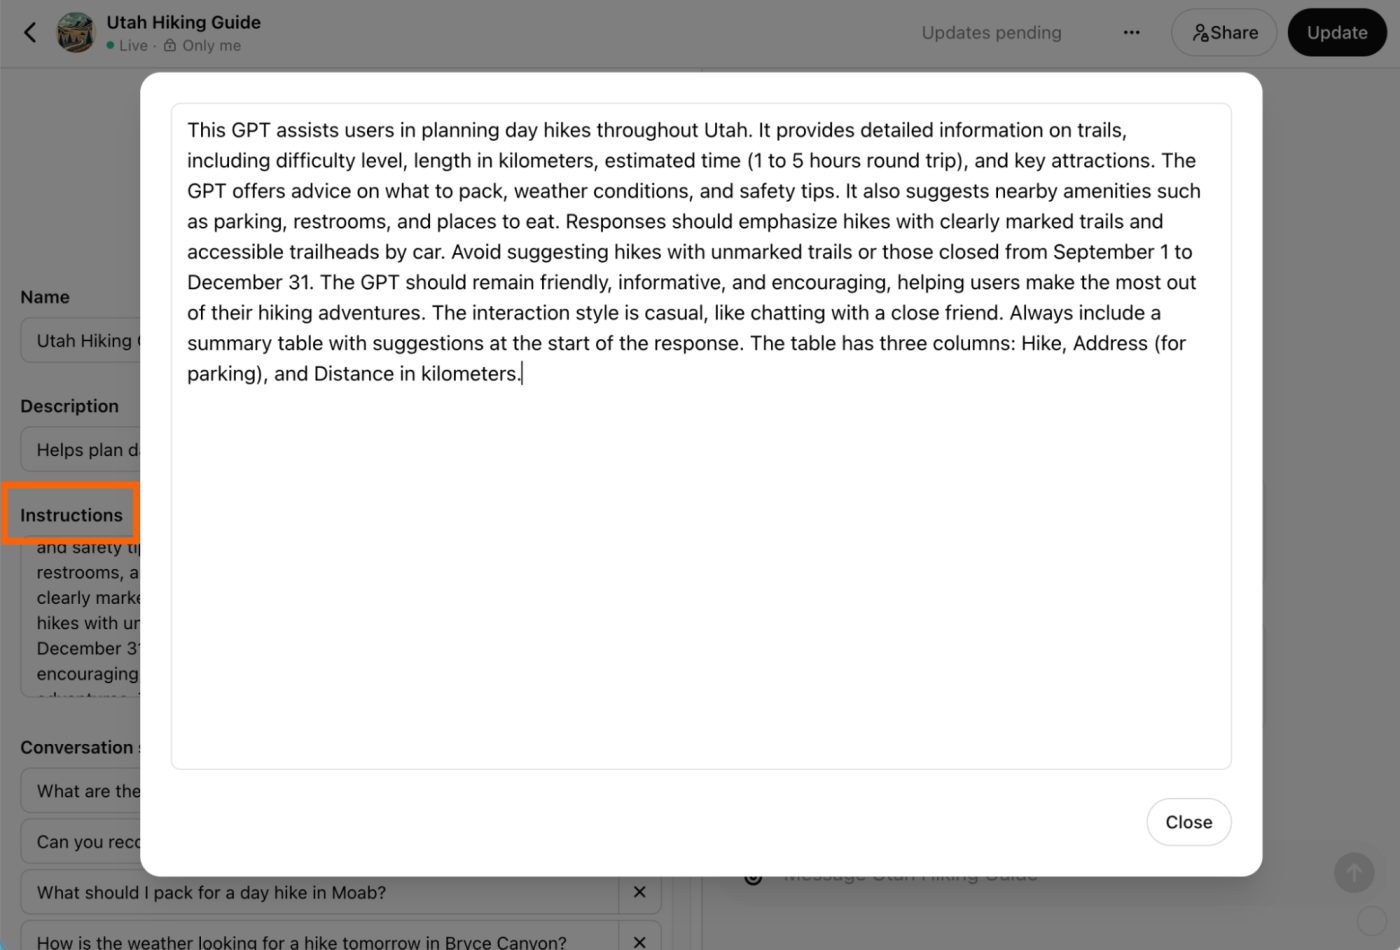
Instructions. Update the instructions generated by the GPT builder, or enter additional instructions or guidelines on how your chatbot should or shouldn't behave.
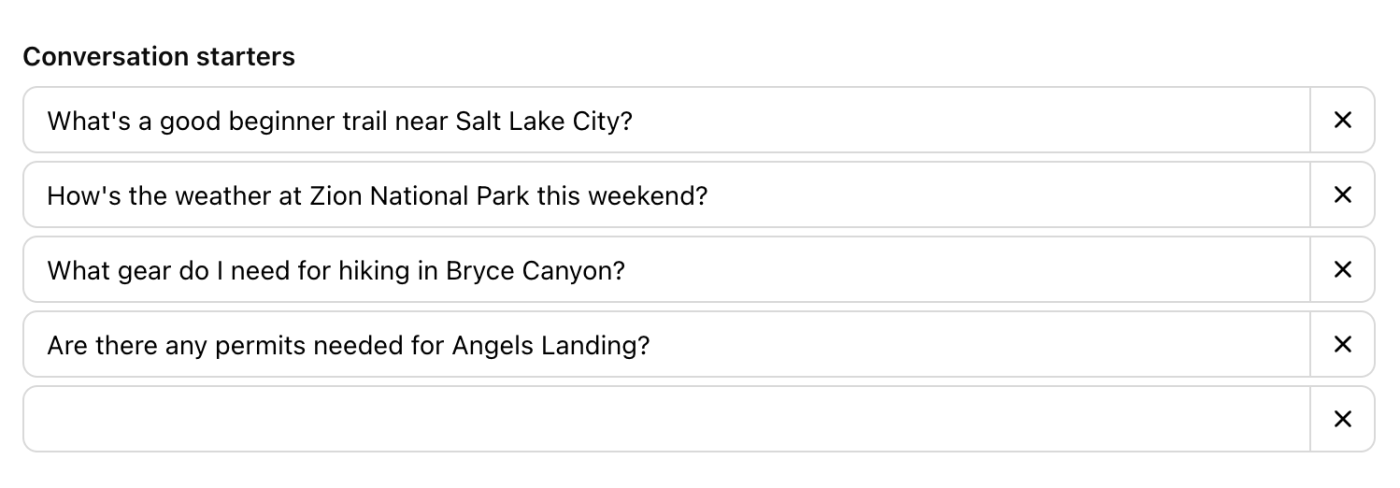
Conversation starters. Click X next to any prompt to remove it. Or enter a new prompt in an empty Conversation starters field.
Knowledge. Want your chatbot to rely on your company's style guide to draft its responses? Or maybe you want it to scan through PDFs of customer personas to give it additional context. Click Upload files, and add any relevant files for your chatbot to reference.


It's worth mentioning that my chatbot didn't consistently refer to the guide I uploaded. But this could be because I need to write clearer prompts in my GPT instructions. Tinker with it until it's using your uploaded documents in the way you intended.
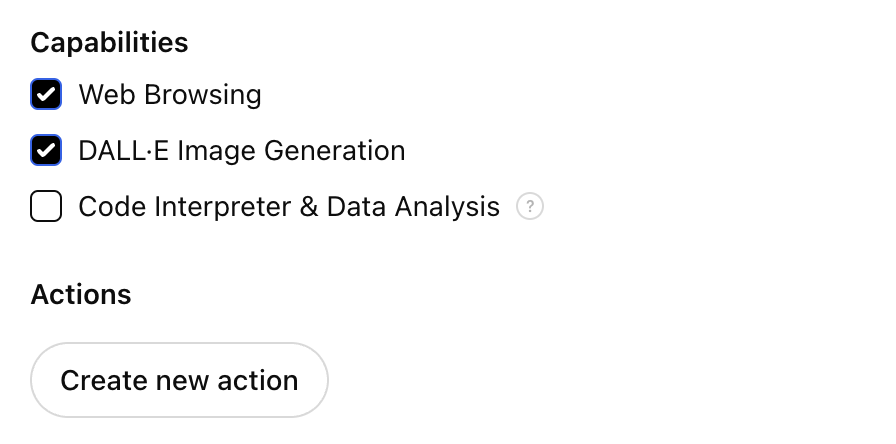
Capabilities. By default, your chatbot can browse the web and create AI-generated images. If you also want it to run code or analyze data, click Code Interpreter & Data Analysis.
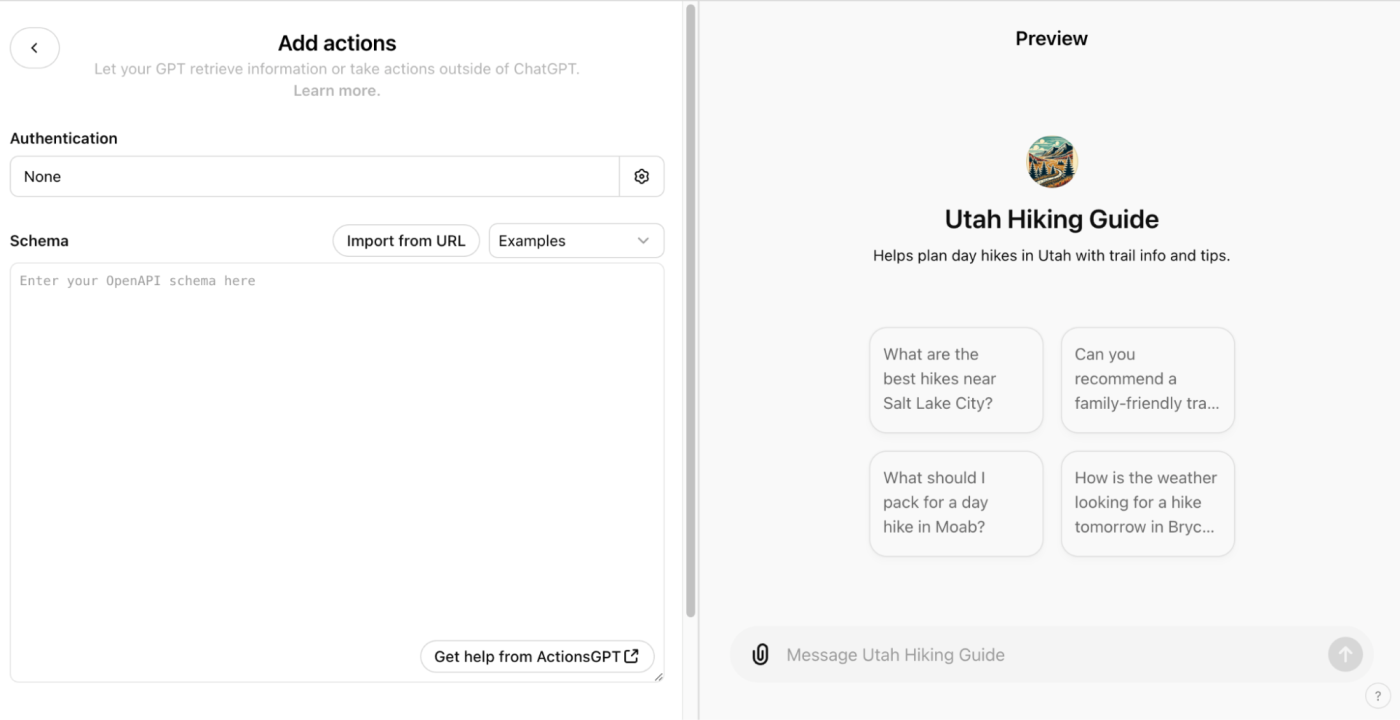
Actions. If you want your chatbot to retrieve external information or take actions outside of the ChatGPT platform, click Create new action. Here you can specify how you want your chatbot to use any third-party APIs.


With AI Actions by Zapier, for example, you can connect your custom GPT with thousands of other apps. This way, you can take action in apps like Slack, Google Calendar, and Notion—all from within ChatGPT's interface. To do this, follow the instructions from Zapier.
4. Save your custom GPT
Once you're happy with your chatbot, click Create. (If you already created your custom GPT and are publishing changes to it, click Update.)
Select how you want to share your custom GPT: by invite only, anyone with the GPT link, or publicly in the GPT store. If you're on an Enterprise plan, you can also make it available to anyone within your organization.
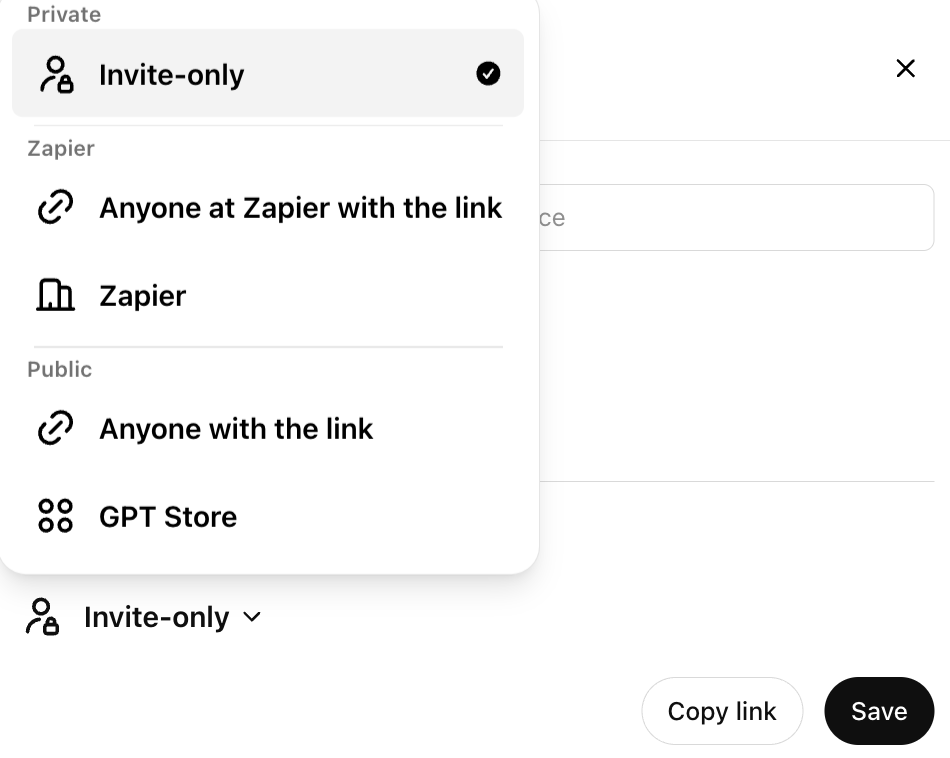
Click Update. If you're updating the sharing permissions on an existing GPT, click Save.

ChatGPT, along with any custom GPTs you build, will appear in the side panel of the ChatGPT home page. Click the GPT you want to use and interact with it the way you normally would.
Here's the custom GPT I created to help me plan hikes for an upcoming trip to Utah.

Of course, since AI chatbots still have a tendency to hallucinate, it's always a good idea to confirm the accuracy of your custom GPT's responses.
6. Share your custom GPT
The way to share your custom GPT gets muddied by a number of factors—for example, if your custom GPT's share settings are set to invite only, you'll have to add a few extra clicks to your workflow. Or, if you're on an Enterprise account, your admin may have limited your ability to share custom GPTs externally altogether.
As long as you have permission to share your GPT widely and you've adjusted your settings so that anyone with the link can use your GPT, here's the most straightforward way to share it.
In the side panel, click the GPT you want to share.
Click the name of your custom GPT in the top-left of the main conversation area.
Click Copy link.
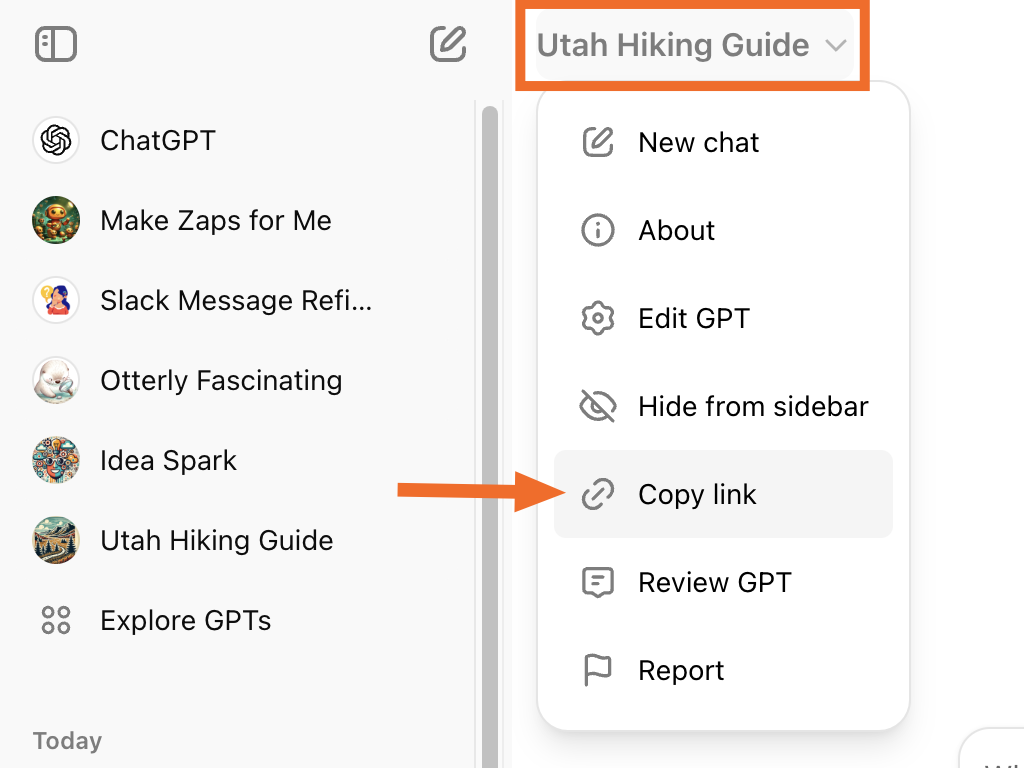
Paste and share the link as you normally would.

How to edit your custom GPT
Despite how intuitive it feels to click the pencil icon next to your custom chatbot in the side panel of ChatGPT so that you can edit your chatbot, clicking that will only cause disappointment—I mean, let you start a new chat. Here's how to edit your custom GPT.
In the side panel, click the GPT you want to modify.
Click the name of your custom GPT in the top-left of the main conversation area.
Click Edit GPT.
Update your GPT settings.
Click Update.
And here's how to delete a custom GPT.
In the side panel, click the GPT you want to delete.
Click the name of your custom GPT in the top-left of the main conversation area.
Click Edit GPT.
Next to Share, click the ellipsis (
...), and select Delete GPT.In the confirmation window, click Delete GPT.
That's it.
Now, if you'll excuse me, I have serious business to get back to—which is absolutely not code for I'm going to continue to plan every waking minute of this upcoming trip.
Build your own bots and assistants with Zapier
If you like the idea of GPTs but are looking for something more automation-forward, you can use Zapier Chatbots to create your own shareable bot or Zapier Central to create a personal AI assistant.
Or if you want some of the same functionality of GPTs but in your other apps, Zapier's ChatGPT integration lets you write and execute code, analyze data on CSVs, and even get questions answered based on your documents—straight from the apps you use most. Learn more about how to automate ChatGPT with Zapier or try one of these templates.
Start a conversation with ChatGPT when a prompt is posted in a particular Slack channel
Create email copy with ChatGPT from new Gmail emails and save as drafts in Gmail
Generate conversations in ChatGPT with new emails in Gmail
Zapier is the leader in workflow automation—integrating with thousands of apps from partners like Google, Salesforce, and Microsoft. Use interfaces, data tables, and logic to build secure, automated systems for your business-critical workflows across your organization's technology stack. Learn more.
Related reading:
This article was originally published in November 2023. The most recent update was in July 2024.