Product Photography 101
- 2. Agenda 1 What is product photography? 2 Why is it important? 3 4 Types of product photography 5 6 DIY product photography 7 Optimize your photos for Shopify 8 Q & ACommon photography mistakes Further resources
- 3. What is product photography?
- 4. The art of taking photos that best represent your product in an accurate and attractive manner
- 5. Why is it important?
- 6. Why is great product photography important? Can make or break your business Closest thing to customer touching/ feeling the product Allows the customer to picture your product fitting into their life Sets your store apart from others Catches visitor’s attention and keeps them from leaving your store
- 7. Types of product photography
- 8. Traditional vs. lifestyle product photography Traditional product photography Lifestyle product photography
- 9. Common product photography mistakes
- 10. Crucial product photography mistakes NEGLECTING TO PREPARE YOUR PRODUCTS This may seem obvious, but you should make sure your products look amazing before you shoot them. This means no smudges, fingerprints, etc. Details invisible to your naked eye will be revealed when photographed and blown up.
- 11. Crucial product photography mistakes INCONSISTENT SHOOTING Develop a set of guidelines for your photography and follow them. Consistency is key, and variations from product to product will distract your customer. Keep everything documented so you can resume shooting at any time with positive results.
- 12. Crucial product photography mistakes DISTRACTING BACKGROUND Some inexperienced retailers look at a white background and think “boring.” Trying to differentiate yourself with a colorful, active background is a huge mistake as it acts as a distraction for your customer. Keep it neutral!
- 13. Crucial product photography mistakes OUT OF FOCUS PHOTOS Don’t take artsy low aperture shots of your jewelry that focus on only one part of the product. Make sure you are using full focus photography that will create a sharp image your customers can trust..
- 14. Crucial product photography mistakes INACCURATE WHITE BALANCE If your white balance is off, a gold image can look blue or vice versa. In case you needed a reminder, both dresses on the right are the exact same, sending the internet into a frenzy last year.
- 16. What you’re going to need Camera Tripod Table Light Foam board White backdrop
- 17. Step 1: Set up your table Place your table as close to the window as possible without intersecting the shadow from the windowsill. Start with the window 90 degrees to the right/left of your setup The closer you are to the window, the softer the light will be You do not want direct sunlight hitting your set
- 18. Step 2: Set up your sweep Ultimate goal is to have your mat board sweep from being flat on your table to being vertical You can place the table against the wall and tape the sweep to both the wall and the table If you don’t have a wall, you will need to make something to secure the back of the sweep to (i.e bricks)
- 19. Step 3: Set up your product in the middle of the surface May seem simple, but can take time to position correctly Pay attention to all the little details, such as keeping the label type centred Don’t be afraid of many tiny little movements!
- 20. Step 4: Set up the reflector card The simple white card is the single most important light modifier to have The light will bounce off the card and fill in all of the shadows How you position this card is a matter of taste, so try it at all different angles!
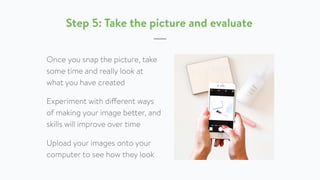
- 21. Step 5: Take the picture and evaluate Once you snap the picture, take some time and really look at what you have created Experiment with different ways of making your image better, and skills will improve over time Upload your images onto your computer to see how they look
- 22. BONUS: Foldio portable studio as an alternative Foldio 2 portable photography kit Built-in LED light strip Powerful companion app Foldable and portable Available for purchase today or at stockroom.shopify.com
- 23. Optimize your photos for Shopify
- 24. Optimize your photos for Shopify REDUCE YOUR IMAGE FILE SIZES Amazon found that if their pages slow down by 1 second, they would lose $1.6 billion a year. Every extra second spent loading a page could be losing valuable customers
- 25. Optimize your photos for Shopify KEEP IMAGE ASPECT RATIO CONSISTENT Make sure all of your images maintain a consistent aspect ratio to create uniformity. Making them all square is the easiest way around this, but you could do a rectangle as well, as long as it is consistent across the board
- 26. Optimize your photos for Shopify ADD ALT TEXT TO ALL OF YOUR PHOTOS Make sure all of your images maintain a consistent aspect ratio to create uniformity. Making them all square is the easiest way around this, but you could do a rectangle as well, as long as it is consistent across the board
- 27. Resources
- 28. Shopify Support support@shopify.com ● 1-888-shopify ● live chat A dedicated support team - available 24/7
- 29. Shopify Blog “The Ultimate DIY Guide to Beautiful Product Photography” Free tools and resources to accelerate your skills and success “40 Tools and Resources For Creating Beautiful DIY Product Photography”
- 30. Shopify Manual A collection of useful guides to help you use Shopify
- 31. Shopify Experts Browse our top experts for photography and all your other ecommerce needs.


