How to use iLinc at WSSU
•Download as DOC, PDF•
0 likes•424 views

1. To create an iLinc session, go to the iLinc website and log in with your username and password. 2. Select "Add New Session" and choose "Class" as the session type. Enter a title, select audio and visual options, date, time, duration, and number of attendees. 3. Upload materials, add attendees by name and email, then save and send invitations to scheduled participants.

How to use iLinc at WSSU
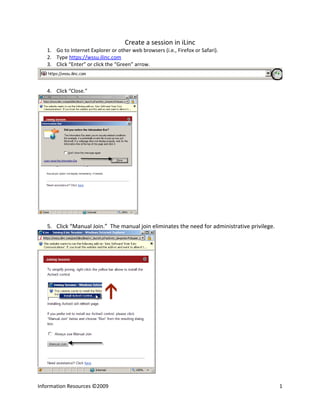
- 1. Create a session in iLinc 1. Go to Internet Explorer or other web browsers (i.e., Firefox or Safari). 2. Type https://wssu.ilinc.com 3. Click “Enter” or click the “Green” arrow. 4. Click “Close.” 5. Click “Manual Join.” The manual join eliminates the need for administrative privilege. Information Resources ©2009 1
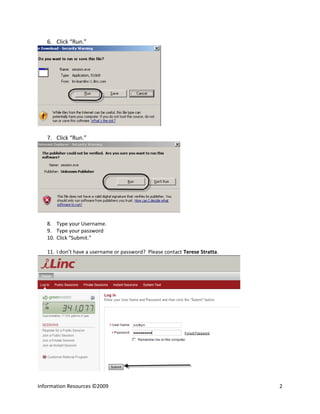
- 2. 6. Click “Run.” 7. Click “Run.” 8. Type your Username. 9. Type your password 10. Click “Submit.” 11. I don’t have a username or password? Please contact Terese Stratta. Information Resources ©2009 2
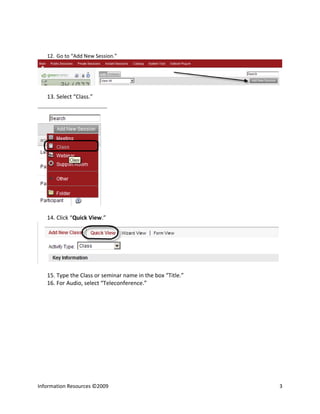
- 3. 12. Go to “Add New Session.” 13. Select “Class.” 14. Click “Quick View.” 15. Type the Class or seminar name in the box “Title.” 16. For Audio, select “Teleconference.” Information Resources ©2009 3
- 4. 17. For Visual, select “Live video.” 18. Click the dropdown box to select the number of attendees. 19. There are three choices to select the schedule--Open, Single Occurrence or Recurring Select “Single Occurrence” for a one-time event. 20. Click the calendar to select the date. 21. Select the date. Information Resources ©2009 4
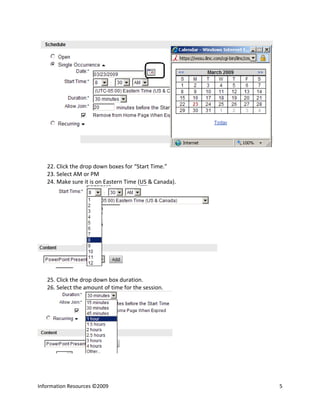
- 5. 22. Click the drop down boxes for “Start Time.” 23. Select AM or PM 24. Make sure it is on Eastern Time (US & Canada). 25. Click the drop down box duration. 26. Select the amount of time for the session. Information Resources ©2009 5
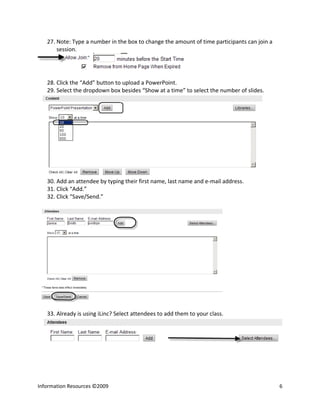
- 6. 27. Note: Type a number in the box to change the amount of time participants can join a session. 28. Click the “Add” button to upload a PowerPoint. 29. Select the dropdown box besides “Show at a time” to select the number of slides. 30. Add an attendee by typing their first name, last name and e-mail address. 31. Click “Add.” 32. Click “Save/Send.” 33. Already is using iLinc? Select attendees to add them to your class. Information Resources ©2009 6
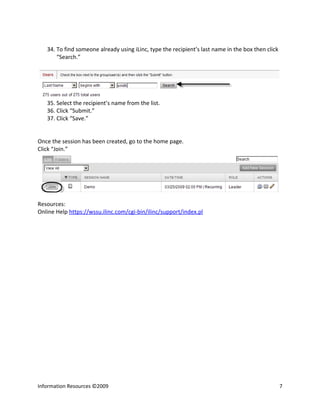
- 7. 34. To find someone already using iLinc, type the recipient’s last name in the box then click “Search.” 35. Select the recipient’s name from the list. 36. Click “Submit.” 37. Click “Save.” Once the session has been created, go to the home page. Click “Join.” Resources: Online Help https://wssu.ilinc.com/cgi-bin/ilinc/support/index.pl Information Resources ©2009 7