Java netbeans
•
0 likes•560 views

The document provides instructions for using NetBeans to develop and deploy a Java application to an Oracle Education Foundation (OEF) Hosted Environment. It outlines downloading and installing Java and NetBeans, configuring NetBeans and a GlassFish server, creating a sample "Hello World" application project, and deploying the application to the OEF environment.
Report
Share


Java netbeans
- 1. Develop and Deploy a Java Application with NetBeans Follow these instructions to use NetBeans to develop and deploy your Java application to the OEF Hosted Environment. Before you begin: Obtain your OEF Hosted Environment URL, username, and password from your coach. Make sure you have unrestricted Internet access and that proxy servers or firewalls are not blocking access to the below-noted resources. Install the Software Download and install the following software. Accept the default components for each install. Java Development Kit 6 Netbeans 7.0.1 – Java EE bundle with GlassFish Server 3.1 o Download the “Java EE” bundle. Configure NetBeans Make sure that the “Java Web and EE” plugin is activated: Open NetBeans. Go to Tools > Plugins. Select the “Installed” tab. All “Java Web and EE” entries listed should have a checkmark under the “Active” column. For those that do not, select “Java Web and EE” and click “Activate”. o The number of “Java Web and EE” entries will vary depending on your operating system. Name your GlassFish server installation: Go to Tools > Servers > Add Server. Select “GlassFish Server 3”. In the “Name” field, enter a name for your server. In this example, we use the name “ThinkQuest”.
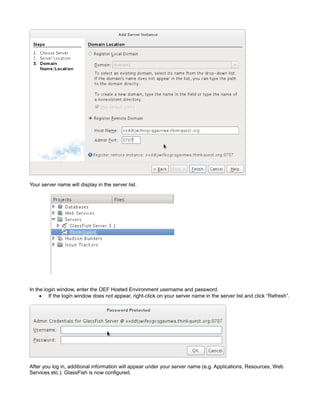
- 2. Click “Next”. Provide a local installation path for your GlassFish server. In this example, we use “C:Program FilesGlassFish- 3.1”: Read and accept the license agreement. Click “Next”. Register your remote domain: Click the radio button next to “Register Remote Domain”. In the “Host Name” field, enter your team's OEF Hosted Environment URL. In this example, we use “xxddtjwifeogcqgavnwa.thinkquest.org”. In the “Admin Port” field, enter “8787”. Click “Finish”.
- 3. Your server name will display in the server list. In the login window, enter the OEF Hosted Environment username and password. If the login window does not appear, right-click on your server name in the server list and click “Refresh”. After you log in, additional information will appear under your server name (e.g. Applications, Resources, Web Services etc.). GlassFish is now configured.
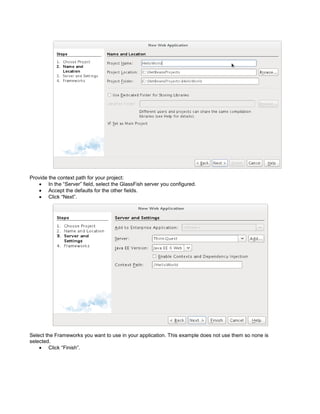
- 4. Create your Application Create a new project for your example application: Open NetBeans. Create a new Project. Go to File > New Project. Select “Java Web” under Categories. Select “Web Application” under Projects. Click “Next”. Name your project: In the “Project Name” field, enter a name for your project. In this example, we name the project “HelloWorld”. Accept the defaults for the other fields. Click “Next”.
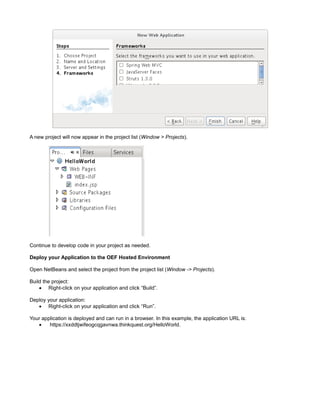
- 5. Provide the context path for your project: In the “Server” field, select the GlassFish server you configured. Accept the defaults for the other fields. Click “Next”. Select the Frameworks you want to use in your application. This example does not use them so none is selected. Click “Finish”.
- 6. A new project will now appear in the project list (Window > Projects). Continue to develop code in your project as needed. Deploy your Application to the OEF Hosted Environment Open NetBeans and select the project from the project list (Window -> Projects). Build the project: Right-click on your application and click “Build”. Deploy your application: Right-click on your application and click “Run”. Your application is deployed and can run in a browser. In this example, the application URL is: https://xxddtjwifeogcqgavnwa.thinkquest.org/HelloWorld.