最后
其实Android开发的知识点就那么多,面试问来问去还是那么点东西。所以面试没有其他的诀窍,只看你对这些知识点准备的充分程度。so,出去面试时先看看自己复习到了哪个阶段就好。
当然我也为你们整理好了百度、阿里、腾讯、字节跳动等等互联网超级大厂的历年面试真题集锦。这也是我这些年来养成的习惯,一定要学会把好的东西,归纳整理,然后系统的消化吸收,这样才能极大的提高学习效率和成长进阶。碎片、零散化的东西,我觉得最没有价值的。就好比你给我一张扑克牌,我只会觉得它是一张废纸,但如果你给我一副扑克牌,它便有了它的价值。这和我们收集资料就要收集那些系统化的,是一个道理。

网上学习 Android的资料一大堆,但如果学到的知识不成体系,遇到问题时只是浅尝辄止,不再深入研究,那么很难做到真正的技术提升。希望这份系统化的技术体系对大家有一个方向参考。
网上学习资料一大堆,但如果学到的知识不成体系,遇到问题时只是浅尝辄止,不再深入研究,那么很难做到真正的技术提升。
一个人可以走的很快,但一群人才能走的更远!不论你是正从事IT行业的老鸟或是对IT行业感兴趣的新人,都欢迎加入我们的的圈子(技术交流、学习资源、职场吐槽、大厂内推、面试辅导),让我们一起学习成长!
==========================================================================
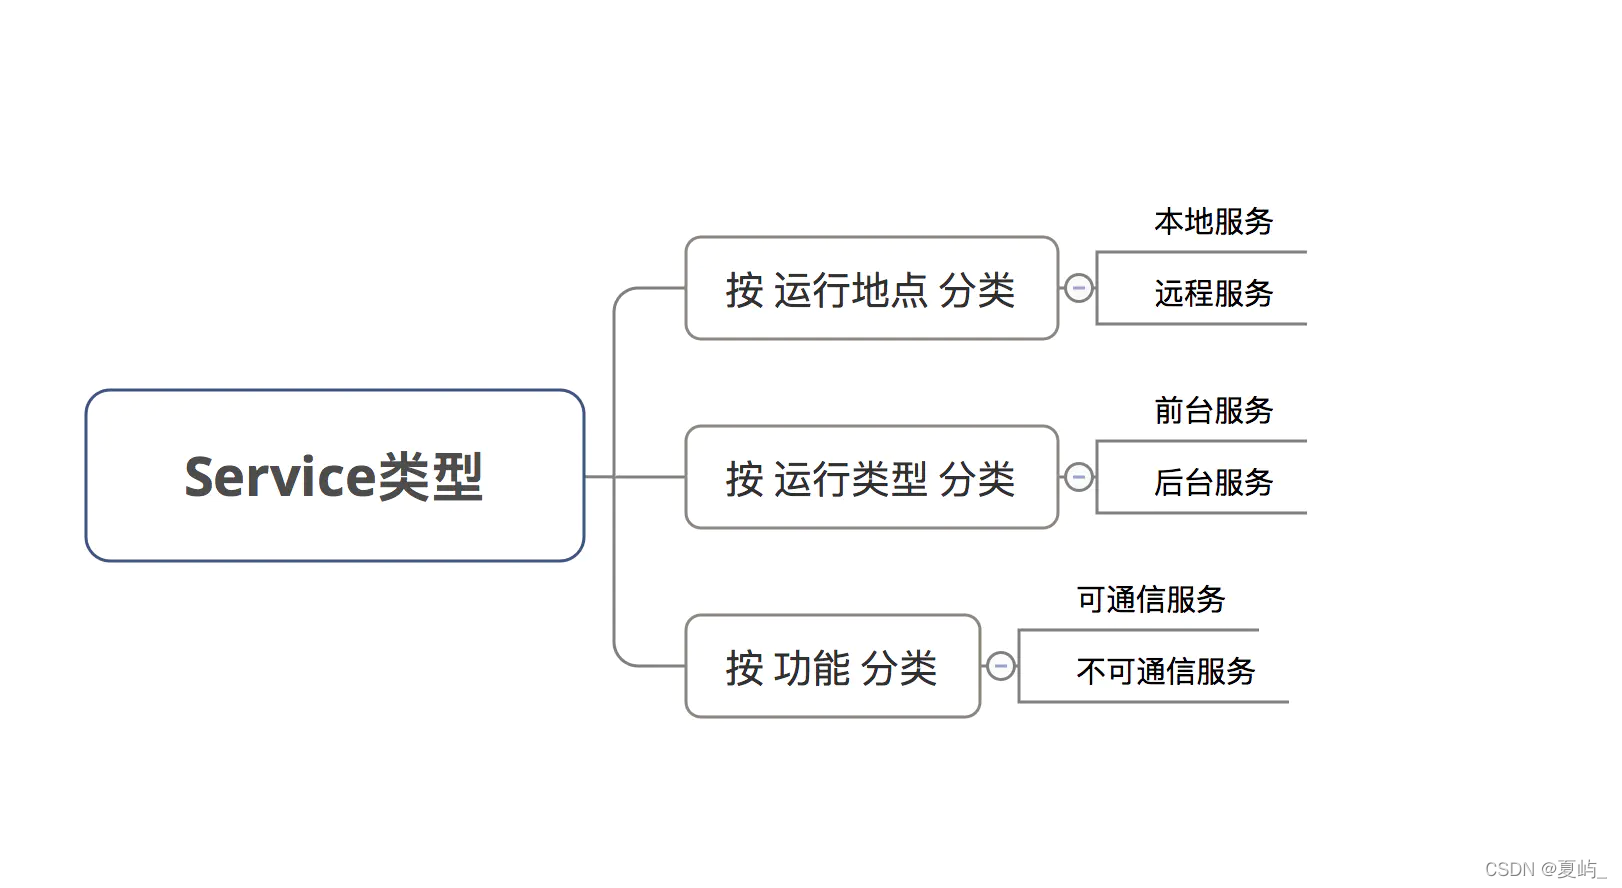
Service可按照运行地点、运行类型 、功能进行分类,具体如下:

=====================================================================
1.创建service

2.需重写父类的onCreate()、onStartCommand()、onDestroy()和onBind()

3.在主布局文件设置两个Button分别用于启动和停止Service
activity_main.xml
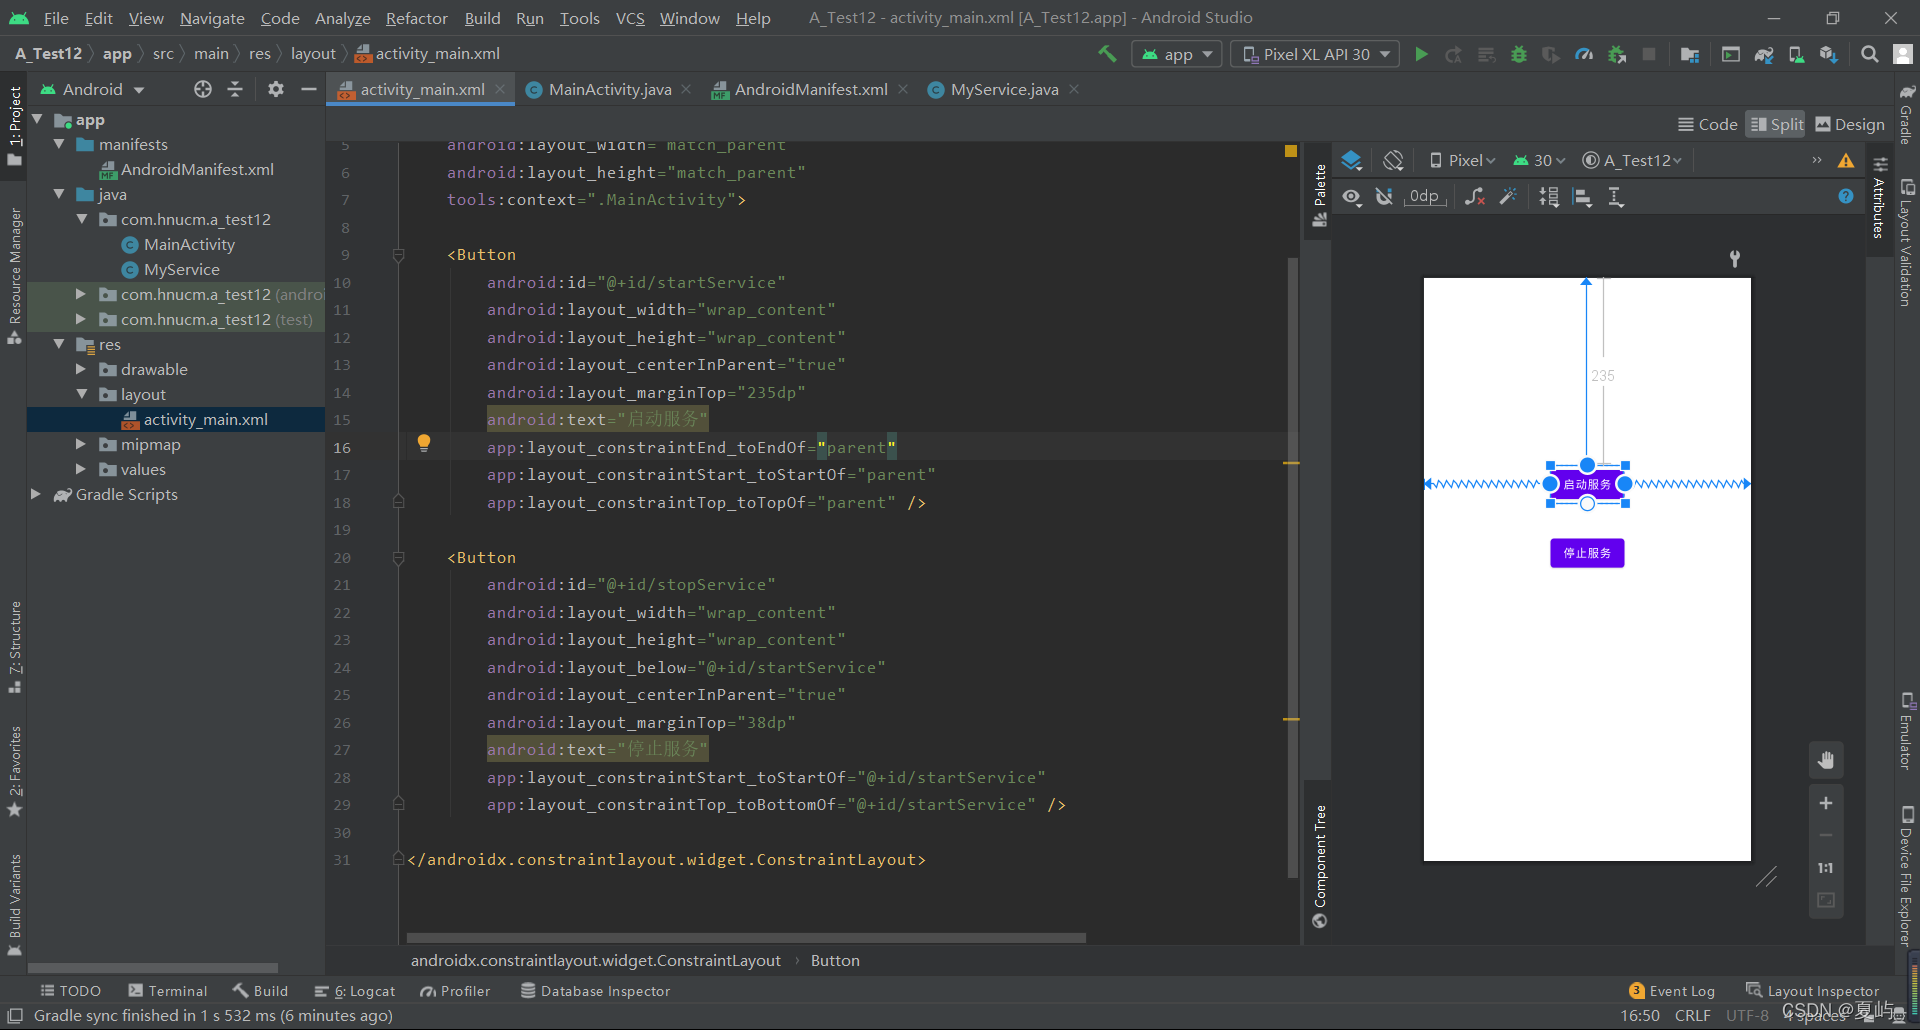
核心代码:
<?xml version="1.0" encoding="utf-8"?><androidx.constraintlayout.widget.ConstraintLayout xmlns:android=“http://schemas.android.com/apk/res/android”
xmlns:app=“http://schemas.android.com/apk/res-auto”
xmlns:tools=“http://schemas.android.com/tools”
android:layout_width=“match_parent”
android:layout_height=“match_parent”
tools:context=“.MainActivity”>
<Button
android:id=“@+id/startService”
android:layout_width=“wrap_content”
android:layout_height=“wrap_content”
android:layout_centerInParent=“true”
android:layout_marginTop=“235dp”
android:text=“启动服务”
app:layout_constraintEnd_toEndOf=“parent”
app:layout_constraintStart_toStartOf=“parent”
app:layout_constraintTop_toTopOf=“parent” />
<Button
android:id=“@+id/stopService”
android:layout_width=“wrap_content”
android:layout_height=“wrap_content”
android:layout_below=“@+id/startService”
android:layout_centerInParent=“true”
android:layout_marginTop=“38dp”
android:text=“停止服务”
app:layout_constraintStart_toStartOf=“@+id/startService”
app:layout_constraintTop_toBottomOf=“@+id/startService” />
</androidx.constraintlayout.widget.ConstraintLayout>
4.编写Activity逻辑代码
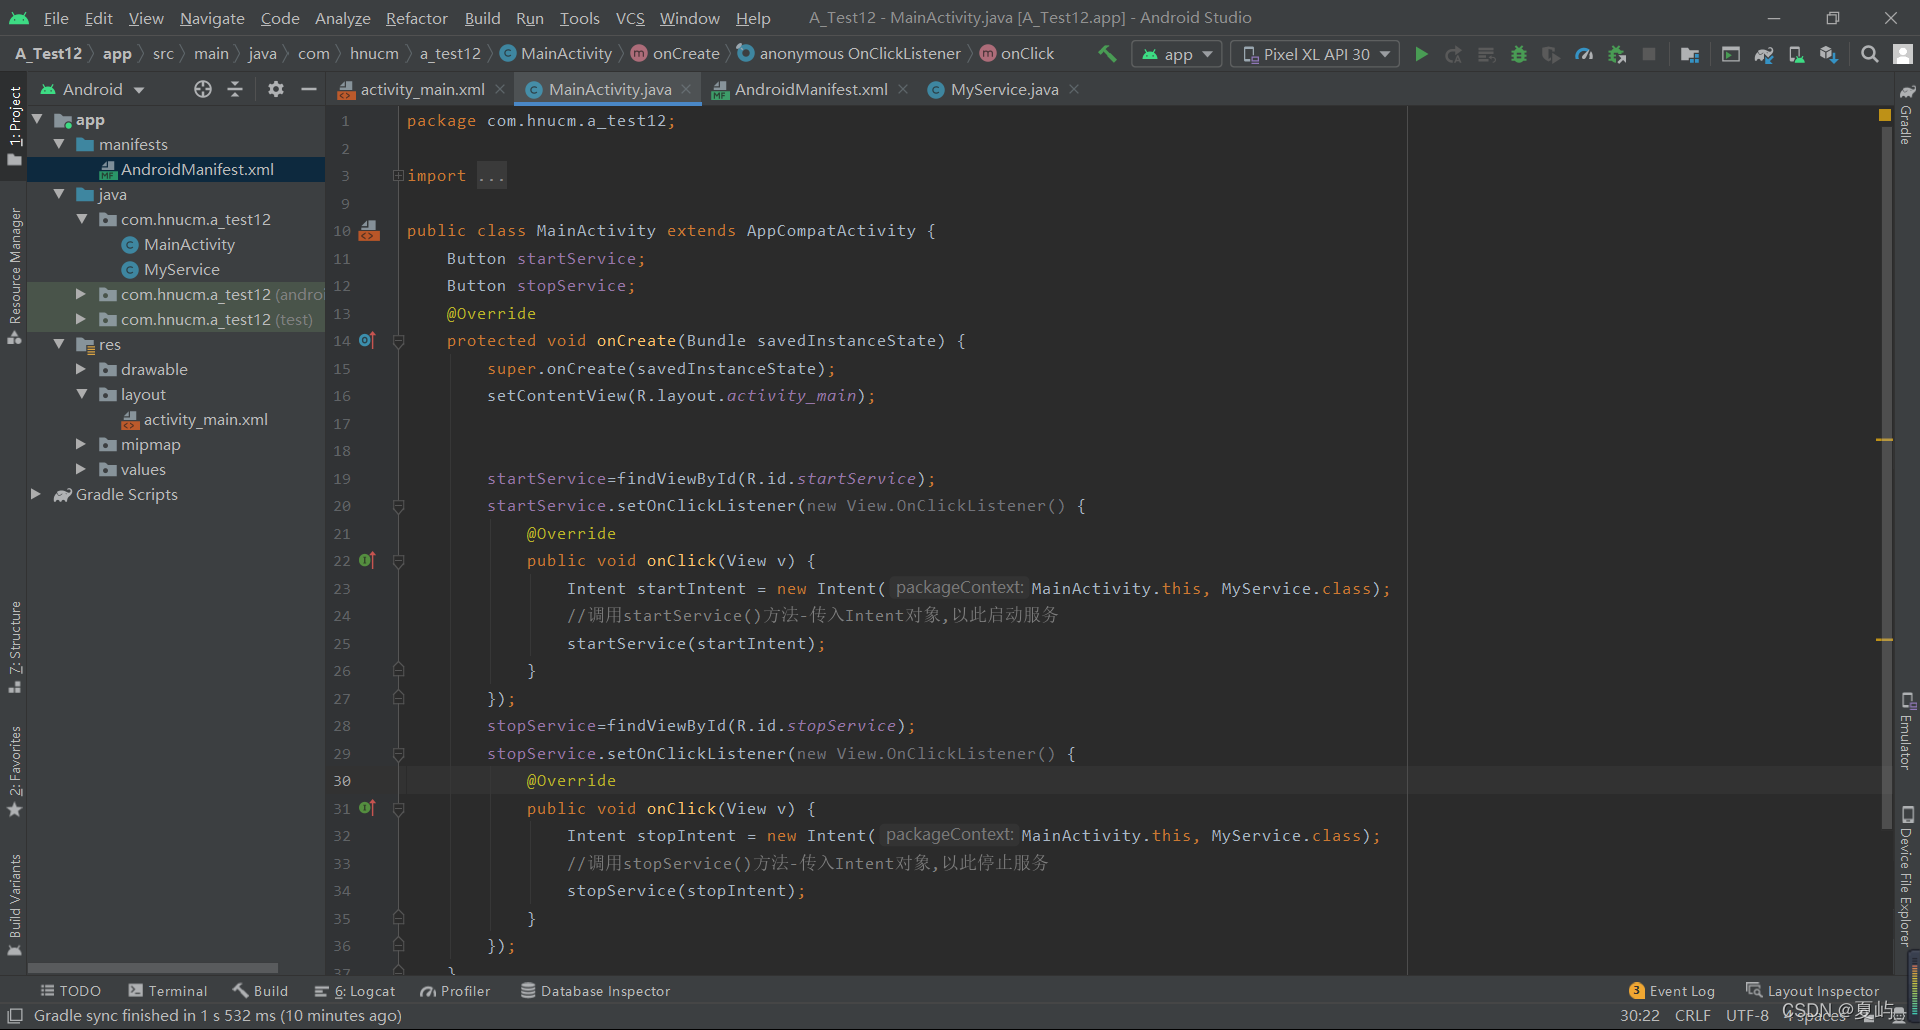
核心代码:
public class MainActivity extends AppCompatActivity {
Button startService;
Button stopService;
@Override
protected void onCreate(Bundle savedInstanceState) {
super.onCreate(savedInstanceState);
setContentView(R.layout.activity_main);
startService=findViewById(R.id.startService);
startService.setOnClickListener(new View.OnClickListener() {
@Override
public void onClick(View v) {
Intent startIntent = new Intent(MainActivity.this, MyService.class);
//调用startService()方法-传入Intent对象,以此启动服务
startService(startIntent);
}
});
stopService=findViewById(R.id.stopService);
stopService.setOnClickListener(new View.OnClickListener() {
@Override
public void onClick(View v) {
Intent stopIntent = new Intent(MainActivity.this, MyService.class);
//调用stopService()方法-传入Intent对象,以此停止服务
stopService(stopIntent);
}
});
}
}

5.运行结果

ps:成功打印了日志,也可以看到我们的界面没有任何的变化
- 上面介绍的Service是最基础的,但只能单机使用,即无法与Activity通信
所以这种方式启动服务只适用于启动以后不需要关闭的一些操作,如果我们需要在启动服务以后,改变其中某种操作的状态,就需要用到service的第二种启动方式
- 接下来将在上面的基础用法上,增设“与Activity通信”的功能,即使用绑定Service服务(Binder类、bindService()、onBind()、unbindService()、onUnbind())
1.重写方法

2.我们再看到 MyService中 这个onBind方法,我们用第二种方法启动服务,一定会回调这个onBind方法,系统就会强制我们返回一个IBinder对象,然后通过activity拿到引用

3.重写MyBinder方法

(因为IBinder接口需要重写九个方法,所以我们找一个已经实现IBinder接口的方法继承---->Binder已经实现了IBinder接口)

4.在主布局文件再设置两个Button分别用于绑定和解绑Service

核心代码:
<?xml version="1.0" encoding="utf-8"?><androidx.constraintlayout.widget.ConstraintLayout xmlns:android=“http://schemas.android.com/apk/res/android”
xmlns:app=“http://schemas.android.com/apk/res-auto”
xmlns:tools=“http://schemas.android.com/tools”
android:layout_width=“match_parent”
android:layout_height=“match_parent”
tools:context=“.MainActivity”>
<Button
android:id=“@+id/startService”
android:layout_width=“wrap_content”
android:layout_height=“wrap_content”
android:layout_centerInParent=“true”
android:layout_marginTop=“235dp”
android:text=“启动服务”
app:layout_constraintEnd_toEndOf=“parent”
app:layout_constraintStart_toStartOf=“parent”
app:layout_constraintTop_toTopOf=“parent” />
<Button
android:id=“@+id/stopService”
android:layout_width=“wrap_content”
android:layout_height=“wrap_content”
android:layout_below=“@+id/startService”
android:layout_centerInParent=“true”
android:layout_marginTop=“38dp”
android:text=“停止服务”
app:layout_constraintStart_toStartOf=“@+id/startService”
app:layout_constraintTop_toBottomOf=“@+id/startService” />
<Button
android:id=“@+id/bindService”
android:layout_width=“wrap_content”
android:layout_height=“wrap_content”
android:layout_below=“@id/stopService”
android:layout_centerInParent=“true”
android:layout_marginTop=“39dp”
android:text=“绑定服务”
app:layout_constraintStart_toStartOf=“@+id/stopService”
app:layout_constraintTop_toBottomOf=“@+id/stopService” />
<Button
android:id=“@+id/unbindService”
android:layout_width=“wrap_content”
android:layout_height=“wrap_content”
android:layout_below=“@id/bindService”
android:layout_centerInParent=“true”
android:layout_marginTop=“24dp”
android:text=“解绑服务”
app:layout_constraintStart_toStartOf=“@+id/bindService”
app:layout_constraintTop_toBottomOf=“@+id/bindService” />
</androidx.constraintlayout.widget.ConstraintLayout>
在Activity通过调用MyBinder类中的public方法来实现Activity与Service的联系
面试宝典
面试必问知识点、BATJ历年历年面试真题+解析

学习经验总结
(一)调整好心态
心态是一个人能否成功的关键,如果不调整好自己的心态,是很难静下心来学习的,尤其是现在这么浮躁的社会,大部分的程序员的现状就是三点一线,感觉很累,一些大龄的程序员更多的会感到焦虑,而且随着年龄的增长,这种焦虑感会越来越强烈,那么唯一的解决办法就是调整好自己的心态,要做到自信、年轻、勤奋。这样的调整,一方面对自己学习有帮助,另一方面让自己应对面试更从容,更顺利。
(二)时间挤一挤,制定好计划
一旦下定决心要提升自己,那么再忙的情况下也要每天挤一挤时间,切记不可“两天打渔三天晒网”。另外,制定好学习计划也是很有必要的,有逻辑有条理的复习,先查漏补缺,然后再系统复习,这样才能够做到事半功倍,效果才会立竿见影。
(三)不断学习技术知识,更新自己的知识储备
对于一名程序员来说,技术知识方面是非常重要的,可以说是重中之重。**要面试大厂,自己的知识储备一定要非常丰富,若缺胳膊少腿,别说在实际工作当中,光是面试这一关就过不了。**对于技术方面,首先基础知识一定要扎实,包括自己方向的语言基础、计算机基础、算法以及编程等等。
网上学习资料一大堆,但如果学到的知识不成体系,遇到问题时只是浅尝辄止,不再深入研究,那么很难做到真正的技术提升。
一个人可以走的很快,但一群人才能走的更远!不论你是正从事IT行业的老鸟或是对IT行业感兴趣的新人,都欢迎加入我们的的圈子(技术交流、学习资源、职场吐槽、大厂内推、面试辅导),让我们一起学习成长!
功倍,效果才会立竿见影。**
(三)不断学习技术知识,更新自己的知识储备
对于一名程序员来说,技术知识方面是非常重要的,可以说是重中之重。**要面试大厂,自己的知识储备一定要非常丰富,若缺胳膊少腿,别说在实际工作当中,光是面试这一关就过不了。**对于技术方面,首先基础知识一定要扎实,包括自己方向的语言基础、计算机基础、算法以及编程等等。
网上学习资料一大堆,但如果学到的知识不成体系,遇到问题时只是浅尝辄止,不再深入研究,那么很难做到真正的技术提升。
一个人可以走的很快,但一群人才能走的更远!不论你是正从事IT行业的老鸟或是对IT行业感兴趣的新人,都欢迎加入我们的的圈子(技术交流、学习资源、职场吐槽、大厂内推、面试辅导),让我们一起学习成长!


 702
702


 到【灌水乐园】发言